Sections
The definitions of documents' sections are managed in the Sections tab of the Resources panel, located in the Resources tab of the project dashboard.
To open the Sections tab:
- Select the Resources tab on the main dashboard toolbar.
- If the concept tree is displayed, turn it off by selecting Toggle custom elements
 on the toolbar of the Resources panel. The concept tree is replaced by a list of tabs.
 - Select the Sections tab in the Resources panel.
To create a new section:
- Select Add section on the tab toolbar.
Or:
- If so section is defined, select Add section in the central part of the page.
-
In the dialog, type a name and select Create or press
Enter.Note
Only capital letters and underscores are allowed for section names.
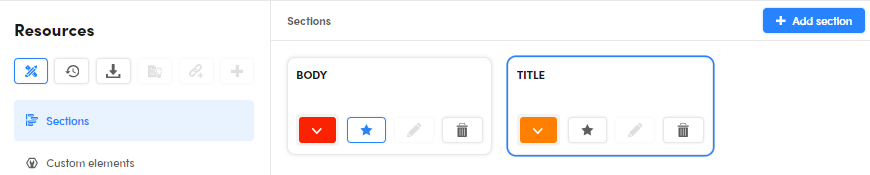
The first section is marked as Standard section, which includes all text not annotated otherwise.
To change the standard section, select the star  inside the section box.
Each section is associated to a color visible during the annotation phase to highlight the associated text. To change the section color, select the color box, then choose one from the color picker.
To delete a section, select it, then select Delete section  . Multiple selection is not allowed.
You can't edit a section name. To achieve the same result:
- Delete the section.
- Create a new one.