Manage project settings
Overview
You can manage the project settings through a dedicated dialog. The tabs of the dialog that are common to more types of projects are described below, the other tabs are described in sections of this manual dedicated to the project types:
To open the project settings dialog:
- Select Project settings
 on the main tooolbar of the project dashboard.
Or:
- Go to the main dashboard and select a project or a corpus.
- In the Project info panel, select Edit
 .
.
General
The General tab is available for all types of projects.
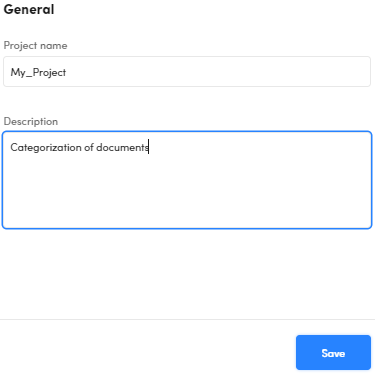
Use this tab to change the project name and add or edit the optional description. When done, select Save to apply changes.
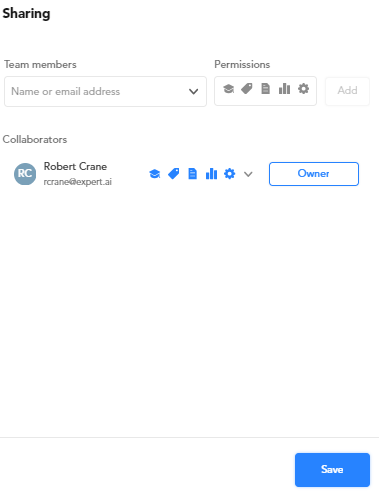
Sharing
The Sharing tab is available for all types of projects. Use this tab to share the project with other users so to manage a team of collaborators.
Tip
This shortcut allows you to directly access only the sharing settings of a project from the main dashboard:
- Go to the main dashboard and select a project.
- In the Project info or Corpus info panel, select Sharing
 .
.
To share the project with another user:
- In Team members select the user from the dropdown list or type the name of the user in the text box.
-
Select the permissions to grant to the user based on the project type:
Permission Icon Corpus Categorization Extraction Thesaurus Knowledge graph customization Edit resources 
N/A ✓ ✓ ✓ N/A Annotate documents 
N/A ✓ ✓ ✓ N/A Edit documents and libraries 
✓ ✓ ✓ ✓ N/A Manage experiments and models 
N/A ✓ ✓ ✓ N/A Edit settings 
✓ ✓ ✓ ✓ ✓ Edit lists and builds 
N/A N/A N/A N/A ✓ -
Select Add.
- Select Save.
To edit permissions for a user:
-
Under Collaborators, select the down arrow
 beside the permissions' icons of the user row.
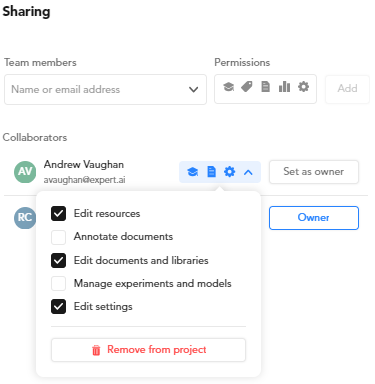
-
Check or uncheck available permissions (see the table above) in the dialog.
- Select the up arrow
 .
. -
Select Save.
Note
You can't edit the project permissions for the project owner.
To set another collaborator as owner of the project, select Set as owner, then select Save.
To stop sharing the project with a user and you are the project owner:
- Repeat step 1 as above.
- Select Remove from project or Remove from corpus, based on the project type.
- Select Save.
To leave a project, if you are not the owner, select Leave, then Save. To leave a project and you are the owner:
- Set another collaborator as owner of the project.
- Select Leave, then Save.
Export project
The Export project tab is available in categorization, extraction and thesaurus projects.
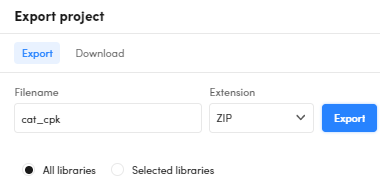
To export the project in a ZIP file:
- In the Export sub-tab, type the file name, without extension, in Filename.
-
Select the libraries to export.
- Select All libraries to export all libraries.
- Select Selected libraries to export specific libraries, then select the libraries from the list.
-
Select Export and wait until the ZIP file is ready to be downloaded.
- In the Download sub-tab or in the notification in the lower right corner, select Download to download the file.
Select Remove
 in the Download sub tab to delete a ZIP file from memory.
Tip
This shortcut allows you to export the project directly from the main dashboard of the application:
- Go to the main dashboard and select a project.
- Select Export
 in the Project info panel then proceed as above.
Experiments
The Experiments tab is available in categorization, extraction and thesaurus projects.
Use this tab to set your preferred metrics policy and—for extraction and thesaurus projects only—the matching strategy.
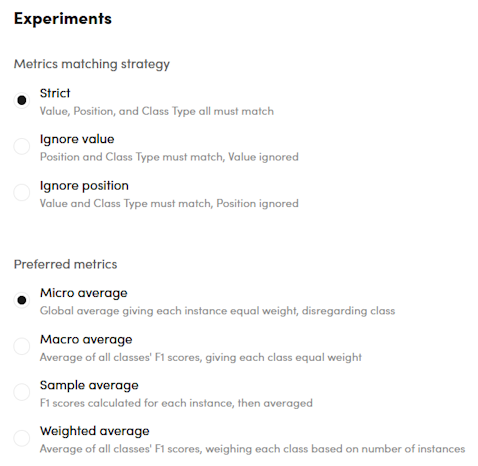
When done, select Save.