Dynamic models
Overview
Dynamic models—one for each chosen project language—are models that, instead of being generated in experiments, are generated once and then continuously updated to reflect any changes to project's taxonomy, advanced extraction rules and kill lists.
They allow project users to see in almost real time the effect of the aforementioned changes on the extraction of concepts from specific test documents.
Dynamic models are shared among all project users, so everyone can see the effects of anyone's changes.
The initial generation and the subsequent updates of the models can be computationally intensive, therefore dynamic models must be turned on manually and are turned off automatically in case of prolonged inactivity.
When turned on again, they must be fully re-generated before the continuous update process can start.
Start initial generation
To start the initial generation of the project's dynamic models:
- Select the cube icon
 beside the tech version icon on the main toolbar. The Dynamic model pop-up appears.
 - Switch on the toggle button. The Select dynamic model preset dialog appears.
- Select Default run settings to create model with default features or, if at least one experiment is recorded, select Last experiment run settings to use the settings of the latest experiment.
-
Select:
- Edit settings to run the settings wizard in its entirety.
Or:
- Fast start to jump to the Summary step of the settings wizard.
The settings wizard
All but the Languages step of the settings wizard correspond to steps of an ordinary experiment run.
In the Languages step you choose the project languages you want dynamic models for. The favorite language is marked with a star beside its name.
At the end of the wizard, select Start: models' generation starts.
Check and control model generation
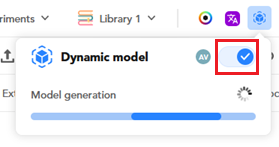
During initial generation the cube icon on the toolbar spins.
Select it to open the Dynamic model pop-up showing the progress of the operation.
To cancel the initial generation switch off the toggle button.
At the end of the initial generation, the models are available for testing and ready to process updates to taxonomy, advanced extraction rules and kill lists. The cube icon stops spinning, becomes blue and gets a solid frame  . Select it to display the Dynamic model pop-up.
![]()
The pop-up shows the same information of the Dynamic model panel of the Test tab (see below) plus the expandable Engine setup panel on the left that shows a summary of model generation parameters. Select the expanding  and collapsing
  arrows to expand and collapse the panel.
To turn off dynamic models select the cube icon and switch off the toggle button.
After half an hour in which no one has used the models to test extraction, dynamic models are turned off automatically.
When dynamic models are off, the cube icon on the toolbar is black with a dashed frame .
Test the models
The Test tab
When dynamic models are available or being generated, the Test tab appears inside the main toolbar. Select it to test generated models against documents written or uploaded at the moment.
The tab page has three panels:
- The left panel contains the list of test documents.
- The central panel allows editing a test document.
- The Dynamic model panel on the right shows model information and allows starting a test and review or change a subset of the model's parameters.
Manage test documents
-
If dynamic models are generated for multiple languages, select the language of the model from the dropdown menu
 above the editor.
The favorite language is marked with a star beside its name. -
Use the editor in the central part of the page to edit the text of the document you want to test the model against.
- To upload a text from a file select Upload document
 above the editor.
 - To clear the editor select Clear document
 above the editor.
 -
To turn on section annotation, select Toggle sections mode
 above the editor. The annotation procedure is the same described in the article dedicated to the topic.
Info
When sections' annotation is turned on, the text goes through a clean up procedure that reduces multiple consecutive newlines to one. In other words, any sequence of empty lines is reduced to one empty line.
During annotation you cannot delete the document or change its text.
To turn off section annotation select Toggle sections mode again.
-
To toggle the left panel, containing the list of test documents, select the list icon
 above the editor.
 - To use a previously defined test document select it from the list on the left panel.
- To create a new test document, select Create new input above the list of test documents in the left panel.
- To delete an existing test document, select it then select Delete document
 above the editor.
 - To delete all the test documents at once, select Clear list below the list of documents in the left panel.
Dynamic model panel
The Dynamic model panel on the right shows the status of the dynamic models and the notifications of the changes.

The round icon beside the panel name contains the initials of the user that started the generation of the models.
The buttons with a language code correspond to the project languages chosen during the first generation. There is a dynamic model for each language.
Selecting a language shows notifications of language-related changes, while language-independent changes, such as creating and deleting concepts, are listed regardless of the selected language.
The icon with the check mark on a green background inside the language button indicates that the model has implemented the latest changes, while the spinning wheel indicates that the model is being regenerated.
Change notifications are divided into three tabs:
- All: all changes.
- Processed: changes already processed.
- Pending: changes waiting to be processed.
The number of implemented and overall changes is reported for the selected language.

The notifications of pending changes have an orange dot  beside their summary, while processed notifications have a check mark on a green background
  .
.
Each notification contains a summary of the change plus the date, the time and the author of the change.
The same information is also reported in the Dynamic model pop-up dialog when selecting the blue cube icon.

Make tests
To test the generated model on the document—in the Dynamic model panel—select:
- Test model
To change some model's parameters before each test:
- Select the slider icon
 . A wizard will start.
 -
Go through these tabs to review and possibly change the corresponding parameters:
-
Select Start in the Summary tab to update the model.
Note
The updates of this kind are fast to apply, so they are immediately effective in the next test. They are not listed in the history of changes of the model.
After each test, results are displayed inside three tabs on the right:
-
Resources, listing extracted concepts with their score and number of occurrences.
You can use the tab it like the Thesaurus tab of the detail view of the higher level Documents tab.
Since test documents don't allow for the annotation of expected results, true positives, false positives and false negatives cannot be reported. -
Entities, containing the entities found in the test document
- Tokens, containing the tokens found in the test document

For a description of entities and tokens see the article about the detail view of the Documents tab.
To highlight the extractions in the document you can also elect the Extractions above the editor. The total number of extractions is reported beside the button.
To find text in the document:
- Select Find text
 .
. - Enter at least three characters in the Find text box and press
Enter. The match is case insensitive. - To the right of the box the number of matches is displayed. Select the X icon
 to cancel the operation.
To get explanations about your extractions, select Toggle debug extractions  . The Debug panel appears on the right. For a description of the panel see the paragraphs dedicated to it in the article about the peculiarities of the Documents tab in thesaurus projects.
When debug is activated, the Rules button—showing the number of rules, if triggered by the text—is shown.

Select it to highlight the scopes of the rules inside the text.
To start a new test, select Back.