Manage models
Overview
Language models are either generated during experiments or imported from CPKs.
To access the list of all the models of the project, select the Models tab.
The tab is divided in the following panels:
- The model list on the left side with the related summarized information, such as:
- Model name
- Execution time
- Training library name
- Number of documents
- Number of annotated documents
- Publishing status
- The model details and the knowledge graph navigation regarding the selected model in the middle.
- Possible operations with the selected model and the related experiments on the right side.
Change the model in focus
To change the model in focus, select it in the list on the left.
Sort the model list based on an item
To sort the model list based on an item, select the related dropdown menu at the top of the list then the criteria of your interest.
Filter the list based on an engine
To filter the list based on an engine, select the related dropdown menu at the top of the list then, in the Engine area, select the engine of your interest.
Filter the list based on a training library
To filter the list based on an training library select the related dropdown menu at the top of the list then, in the Train library area, select the library of your interest.
Search for a model
To search for a model enter the search criteria (minimum three characters) in the search bar then press enter.
Select  to reset the search criteria.
Upload a CPK
To upload a CPK file select Upload CPK  .
.
Once a CPK is uploaded the remapping panel is automatically displayed.
Remapping
After importing the CPK, the remapping panel is focused on the Remapped tab and it displays the result of the automatic remapping that it could be also empty in the worst case.
Since the imported CPK model may differ from the project you are working on, for example because it is produced at different times or by different users, it is sometimes necessary to remap it.

To perform the project remapping use the following tabs.
Note
It is also possible remap the resource later selecting Remap model.
All resources
This tab shows the complete resources of the imported model and if and how they have been remapped.
If no automatic remapping occurred, no match is displayed. Therefore, it is be possible to perform a manual remapping.
If you want to manually remap a resource from the imported model to a category of the existing project:
- Select a category from the list box on the right side.
- Select Save to confirm.
This mapping will be displayed in the Remapped tab.
Select Exit to exit.
Remapped
This tab shows the remapped items, both manually and automatically.
If you want to manually remap a resource from the imported model to a category of the existing project:
- Select a category from the list box on the right side.
- Select Save to confirm.
Select Exit to exit.
Missed
This tab shows the imported model resources that don't have a mapping with the existing model resources.
If you need to remap a resource from the imported model to a category of the existing project:
- Select a category from the list box on the right side.
- Select Save to confirm.
This mapping will be displayed in the Remapped tab.
Select Exit to exit.
Not Mapped
This tab shows the existing resources that don't have any mapping with the imported resources.
Select Exit to exit.
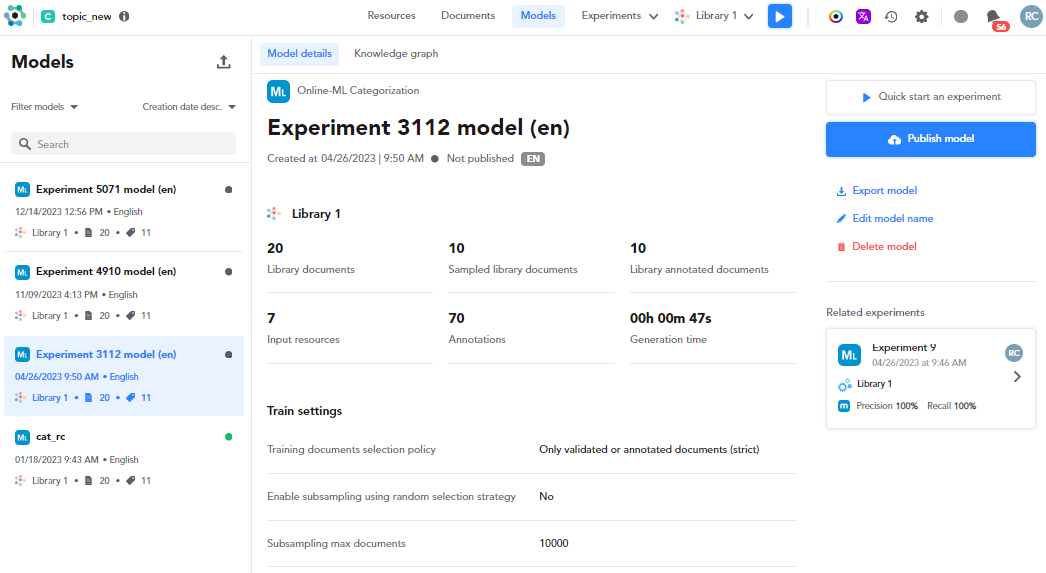
The model details
Select the Model details tab (displayed by default when you access the Models tab) to display information regarding the:
- Training library.
- Training settings.
If the model in focus is an uploaded CPK the panel shows information about Knowledge graph navigation
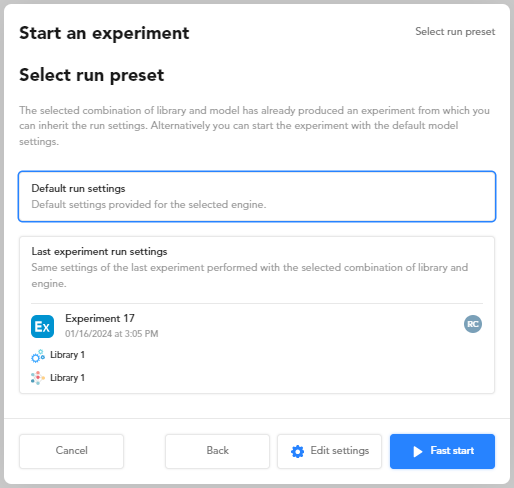
Select the Knowledge graph tab to navigate the knowledge graph used in the model in focus. Note Only the list view is available. To start an experiment with the selected model in focus: If the experiment you are starting: The Select run preset dialog appears. In this dialog: Select: Or: Select Edit settings or Fast start to go to the next step. If your project has sections and you selected a model made with the Explainable Categorization type or a CPK, select: Or: Or, if your project has documents with layout and you selected a model made with the Explainable Categorization type or a CPK, select: Or: Or: Note If your model has both documents with layout and sections, in the Experiment settings, Summary area, these options are available respectively in the Layout and Sections sub-tabs. Select Start. To start an experiment with no models in the Models tab, select Start an experiment, then follow the procedure described in the dedicated page. To create a knowledge graph customization project: Note To publish a model, select it from the models list and, if not a CPK, select Publish model. Note If you publish a model for the first time, you will be asked to give it a name. Once a model or a CPK is published, it is marked with a green dot in the model list. Published models are available to be used in the workflows of the NL Flow part. To unpublish a model, select Unpublish model on the right panel. Select Remap model if you need to remap the resources (categories in the categorization projects) between the imported CPK imported and the existing project. To export a model: In the Export model window (or Export CPK window), type the model name in File name or confirm the suggested one, then select: Or: Select Download either in the dialog or in the notification in the lower right corner. To edit a model name, select Edit model name. To delete a model, select Delete model. To check related experiments, if any, see the Related experiments sub-panel. Double-click the experiment to view its quality.Start an experiment with the selected model
Start an experiment with no models
Create a knowledge graph customization project
Publish and unpublish a model
Remap a model (for CPKs only)
Export a model

Edit the model name
Delete a model
Related experiments