Users accounts
The User accounts tab of the administration dashboard allows users belonging to the Owner and Admin roles to manage the accounts of the human users of the Platform's interactive applications.
Add a new user
To add a new user:
- Select New user account in the User accounts panel.
- In the Create user account panel, enter the user's data and role.
- To set an expiration date for the user's access, use the Access expiration toggle switch. When activated, set the Expiration date field.
-
Select Create.
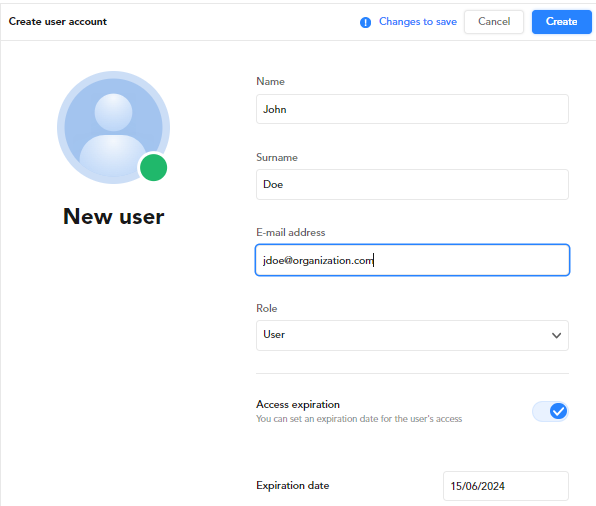
The new user receives an email notification containing the temporary password. The user will be prompted to change the password during the first login.
Search for a user
To search for a user, enter the search criteria in the search box in the User accounts panel, then press Enter.
To reset the search criteria, select the X icon  inside the search box.
Filter users
To filter the list of users based on the role, choose from the Roles dropdown menu in the User accounts panel.
To filter the list of users based on their status—either active or disabled—, choose from the Show dropdown menu in the User accounts panel.
The icon of active users has a green dot beside it, while the icon of users that have been disabled has a red dot.
| Active users | Disabled users |
|---|---|
 |
 |
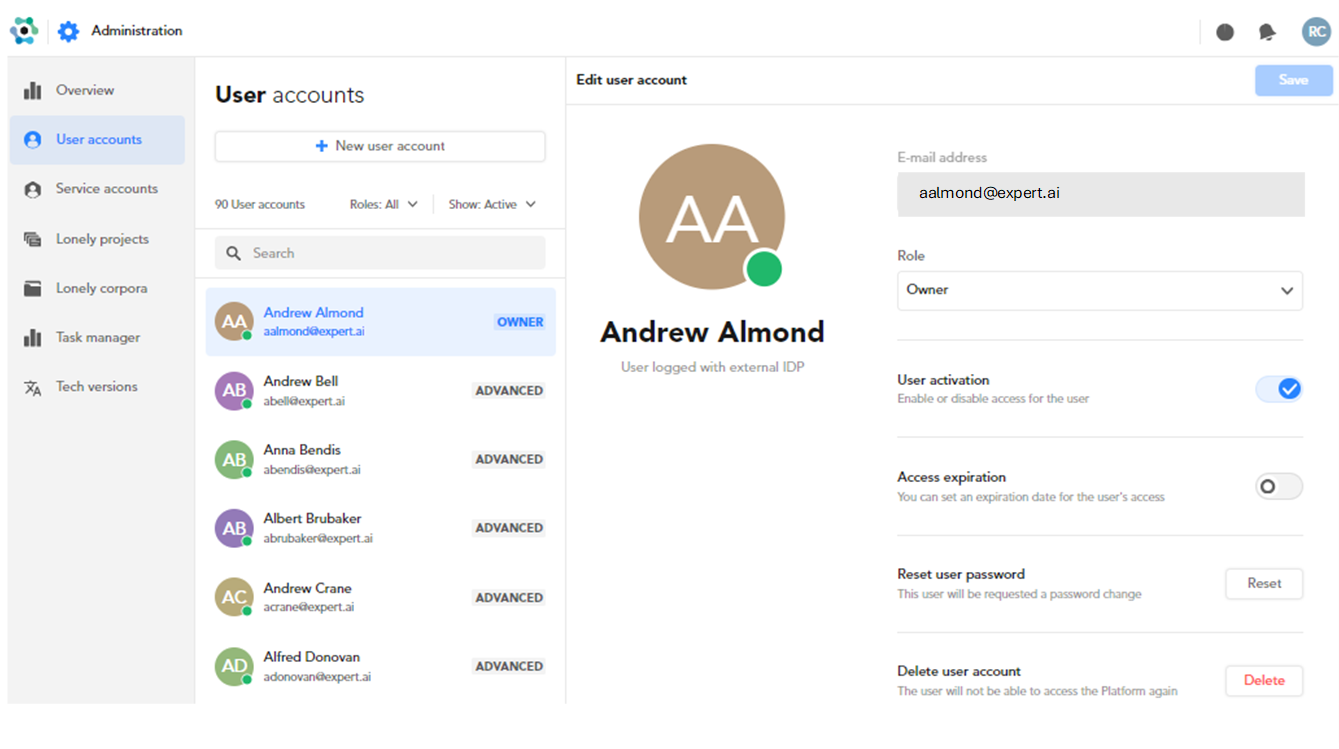
Edit and delete a user
To edit or delete an account, select a user in the User accounts panel, then, in the Edit user account panel on the right:
- To change the user's role, select the new role from the Role dropdown menu.
- To disable and re-activate the account, use the User activation toggle switch.
- To turn the account expiration on and off, use the Access expiration toggle switch. When activated, set the Expiration date field.
- To reset the password, select Reset password. The user will have to enter a new password during the next login.
- To delete the user's account, select Delete. In the confirmation dialog, enter the user's email address.
Select Save to save any changes.
When you delete a user account, all the corpora and projects owned by the user will be removed, including those shared with other users. To avoid the loss of projects and corpora:
- Disable the user.
- Set a new owner for the projects and corpora (see below).
- Delete the user and select Save.
If you select a user that's been disabled from the User accounts panel, three tabs appear on the right side:
- Information: account information
- Projects: "lonely" projects belonging to the user that's been disabled
- Corpora: "lonely" corpora belonging to the user that's been disabled
Manage lonely projects and corpora
In the lists inside Projects and Corpora tabs the TV column of the list shows the tech version the project or corpus is based upon. The green dot  in the Status column indicates that no analysis or loading operations are in progress.
- To change the sort order select the header of any column except Owner.
- To toggle the list of the users—that is the owner plus the collaborators the project or corpus is shared with—of a project or corpus, select the expand
 and the collapse
  icons to the left of the project row.
 -
To give the ownership of a project or corpus to a collaborator:
- Expand the project or corpus row as explained above.
- In the Collaborators list, select Set as owner below the collaborator's name.
- Select Confirm.
-
To give the ownership of a project to a user that is not a collaborator:
- Select the project or corpus, then select Set new owner.
- In the Set new project owner dialog (for a project) or Set new corpus owner dialog (for a corpus), type the user's name.
- Select Save.
-
To get information about the tech version of the project or corpus, hover over the tech version icon.
- To start the creation wizard for a knowledge graph customization project based on the tech version of a project or corpus, hover over the tech version icon row and select Knowledge Graph Customization.