Annotate target extractions
Annotating the target extractions for a test document means indicating the expected extraction results for that document.
There are two areas of the Studio IDE where you can annotate target extractions:
- The editor
- The Extraction tool window
It is then possible to manage—modify or delete—the annotations using the Annotation tool window.
Set the list of fields to choose from
In the editor you use the context menu to annotate extractions.
The context menu allows you to directly choose the field from a list or have a dialog in which you can specify any field.

Determine which fields appear in the list by checking them in the Templates panel of the Classes tool window.
Extractions that have already been annotated are displayed in the list, but with gray ink, and cannot be selected.
To these fields, Studio adds other suggestions based on the results of analysis and user activities.
Annotate in the editor
In the editor you can annotate expected extraction results for the current test document:
- Select the portion of text that you expect to be extracted then right-click and choose Annotate Extraction > Annotate "XXXX" as YYYY.ZZZZ to annotate an extraction of value XXXX for the ZZZZ field of YYYY template.
Or:
- Select the portion of text that you expect to be extracted then right-click and choose Annotate Extraction > Annotate...
- Choose the template from the Template drop-down list.
- Choose the field from the Field drop-down list.
- Optionally select one of the suggestions, one of which is the normalized value visible in output.
- If you want, you can change the expected extraction value by changing the Value field.
- Select OK.
Annotate in the Extraction tool window
Annotating in the Extraction tool window is useful because you can easily indicate if the extraction results you already obtained for a test document are correct or not.
First select Toggle Annotations Visibility  on the left panel toolbar to display the annotation toolbar, then use the annotation toolbar controls at the bottom of the left panel.
- Select the extraction you want to annotate from the list of results.
- If you want, in the Annotate: list you can select another template-field couple and a different extraction value in the field alongside.
- In the annotation toolbar choose Annotate.
Alternatively:
- (Optional) Filter your extractions according to the template name with the Filter by type drop-down menu
- Select Annotate All to annotate all extractions belonging to the specified template.
If no filter is applied, all extractions will be annotated.
Info
A single extraction can imply multiple hits. By annotating an extraction result, therefore, you create as many annotations as there are hits, one annotation for each hit.
Value selection for annotations
Some entities deriving from specific attributes are normalized in output after an analysis.
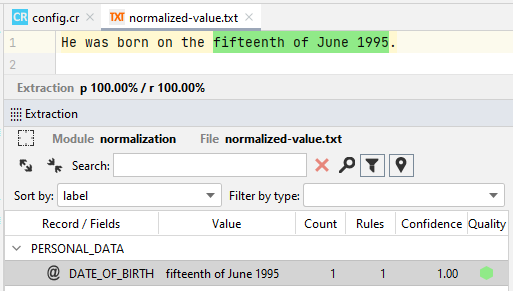
For example, if you have this text:
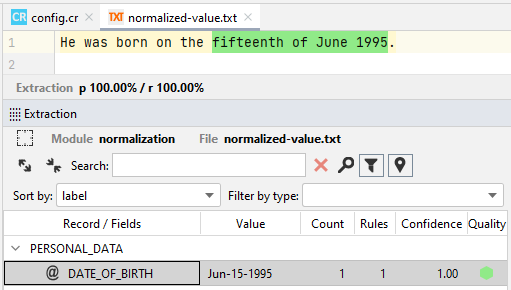
He was born on the fifteenth of June 1995.
and you have to extract the date of birth, you will get:
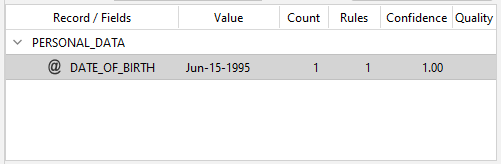
As you can see, the value in output is normalized according to the textual value. For an effective annotation, the value to annotate must correspond to the normalized field value in output.
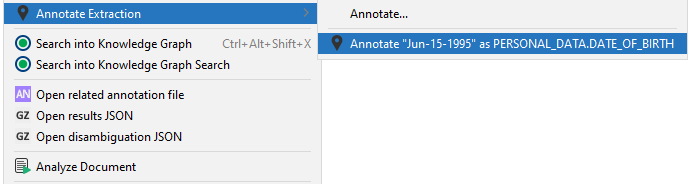
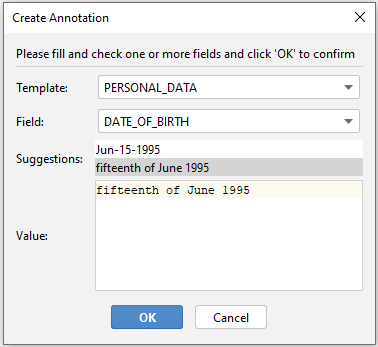
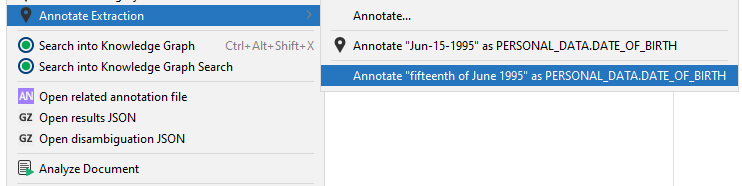
This is what you see in the editor context menu when you want to annotate the date in this way:
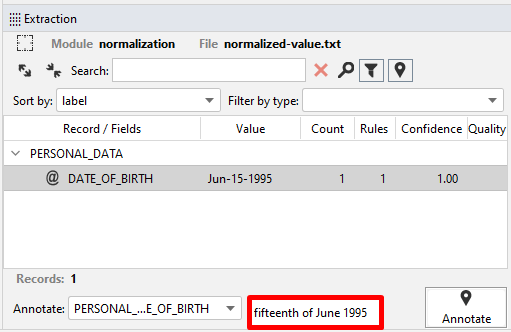
This is what you see in the Extraction tool window after selecting Toggle Annotations Visibility when you want to annotate the date in this way:
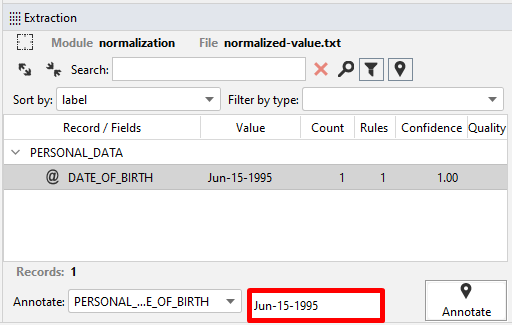
By annotating the normalized value Jun-15-1995 and after another analysis, the annotation will be considered as a true positive.
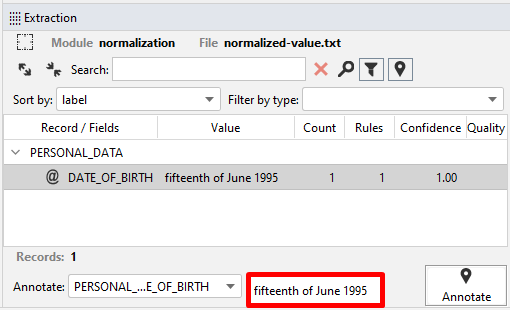
On the other hand, if you want to annotate the textual value and not the normalized one either by turning the normalized value into the textual one in the Extraction tool window or by selecting the textual value in the Create Annotation dialog among suggestions, like this:
| Editor context menu | Extraction |
|---|---|
 |
 |
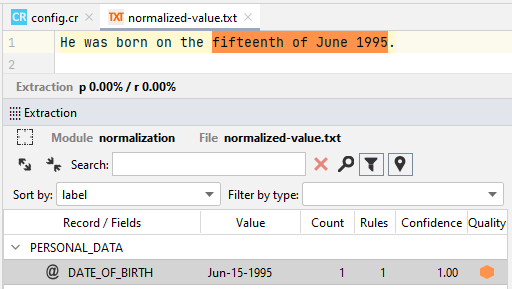
after another analysis, the annotation will be considered as a false positive, because it does not correspond to the normalized value.
Warning
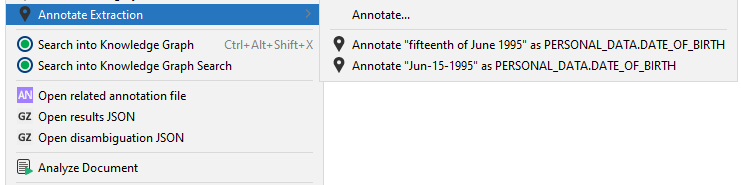
If you delete the textual annotation from the Annotation tool window and annotate the value again with the context menu, you will see this:
The textual value previously annotated as a false positive is considered as an annotation suggestion in the context menu together with the normalized value, the latter to be used to get a true positive.
In another case, if you want the textual value to be considered as a true positive, you can use transformation. For example, if you use the TEXT transformation option to extract the date in the same sentence above, you will get:
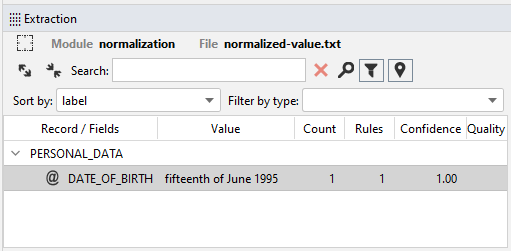
This is what you see in the Extraction tool window after selecting Toggle Annotations Visibility when you want to annotate the date in this way:
This is what you see in the editor context menu when you want to annotate the date in this way:
As you can see, the textual value derived from transformation and the normalized one are suggested as potential annotations.
Note
Output-based annotations in the context menu that immediately turn into true positives after another analysis are marked by this icon  .
.
By annotating the normalized value fifteenth of June 1995 and after another analysis, the annotation will be considered as a true positive.