Insert rule labels
Overview
Labels help identify categorization and extraction rules when looking at the structure of a rules file in the Structure tool window or when examining analysis results in the Categorization and in the Extraction tool windows.
Labels can be added by hand in square brackets ([]). As an alternative, a command exists to assign semi-random, auto-generated labels to all the rules defined in a file.
To add auto-generated labels for the current file:
-
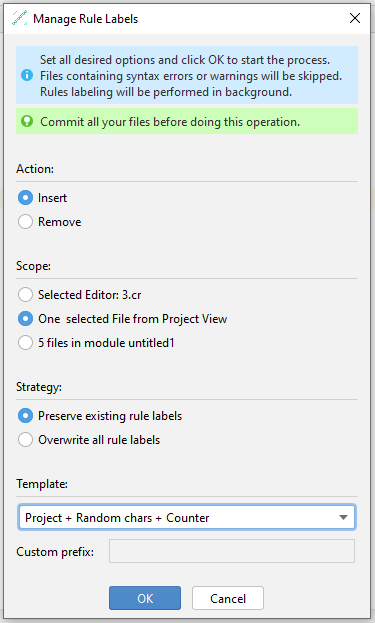
Right-click anywhere in the text of the rule file and select Manage Rule Labels.
-
In the dialog, select the action:
- Select Insert to insert rule labels.
Or:
- Select Remove to remove rule labels.
-
Select the scope. You can select:
- The file in the editor.
Or:
- A file selected from the Project tool window.
Or:
- All your rule files.
-
Select a labelling strategy in Strategy:
-
Select Overwrite all rule labels to overwrite your previously created labels.
Or, vice versa:
-
Select Preserve existing rule labels.
-
-
Select the labelling pattern from the Template drop-down menu. You can select:
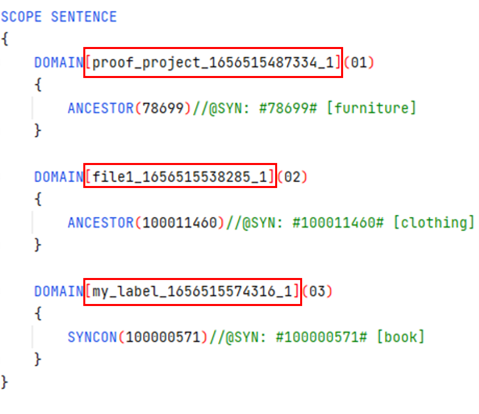
- Project + Random chars + Counter: project name plus random alphanumeric characters plus a rule counter.
- Module + Random chars + Counter: module name plus random alphanumeric characters plus a rule counter.
- File + Random chars + Counter: file name plus random alphanumeric characters plus a rule counter.
- Custom Prefix + Random chars + Counter: custom label plus random alphanumeric characters plus a rule counter.
-
If you choose Custom Prefix + Random chars + Counter, type a label in Custom prefix.
- Select OK or press
Enter.
Note
If you select Remove, the Strategy and Template sections will not be available.
Each element of the rule label is separated by underscores (_). They also replace blank spaces in case your custom prefix is made of separated words.
The format of the labels can also be customized through the Studio configuration properties.
Tip
The Insert Rule Labels command is like other editing commands, so its effects can be reverted using the undo command.
You are free to change auto-generated labels at will.
Other labels
You can assign your rule other labels in form of comments. These can be:
- Header comments, written before the declaration of the rule.
- Internal comments, written inside the rule declaration.
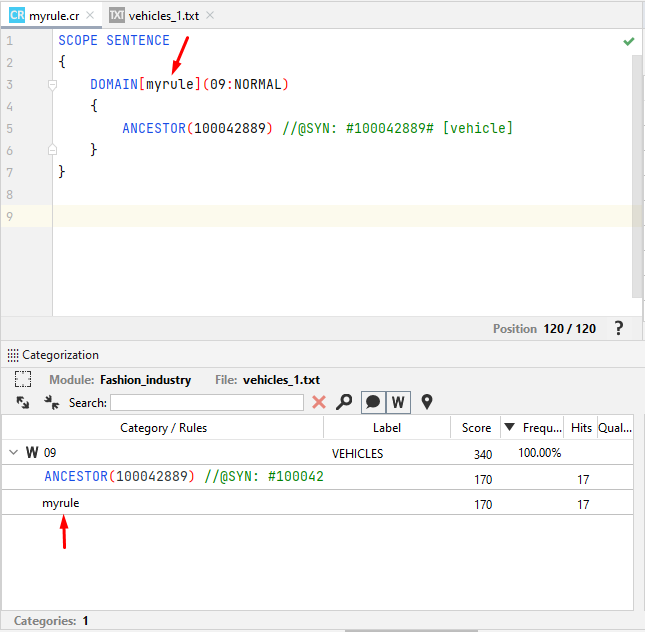
For example, this rule:
SCOPE SENTENCE
{
    //HeaderComment
    DOMAIN(dom1)
    {
        //InternalComment
        LEMMA("dog")
    }
}
has both a header comment and an internal comment. If the rule triggers, you will see:

As you can see, only a single label is visible because a priority has been given. Check below how to set priorities.
Set label priorities
It is possible to set a priority on which label type you want to see first in comparison with the others when a rule triggers. To set this priority:
- Go to the Studio Settings window and select Rules > Label.
- Select the value of Rule description source. The Rule Description Source dialog will appear.
- Select MOVE UP
 or MOVE DOWN
  to move the label types up and down in terms of priority assignment, then select OK.
In a situation like this, considering the rule above:
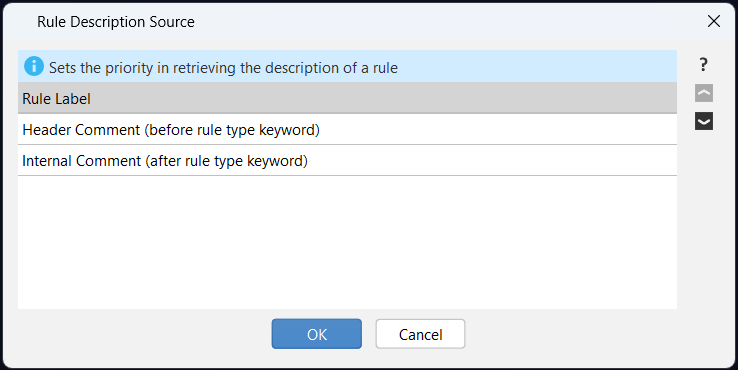
the Rule Label option has priority. If no rule label is found, priority is given to the Header Comment (before rule type keyword) option and so on. If no comment is found, you will see the rule code snippet.
Note
In case of extraction rules, all types of labels are visible in the Rule Details panel of the Extraction tool window.
For a description of:
- Header Comment (before rule type keyword)
- Internal Comment (after rule type keyword)
see the configuration properties.