Edit project settings
Overview
To change the project settings:
- Select Project settings
 .
.
Or:
- Go to the main dashboard and select a project.
- In the Project info panel, select Edit
 .
.
Project name
Select the General tab, enter the project name and the optional description, then select Save.

Project sharing
In case you need to change the sharing properties only, in the main dashboard:
- Select a categorization project.
- In the Project info area, select Share
 .
.
Or:
- Select Project settings and go to the Sharing tab.
Share the project with a team member and grant permissions
In the Sharing tab:
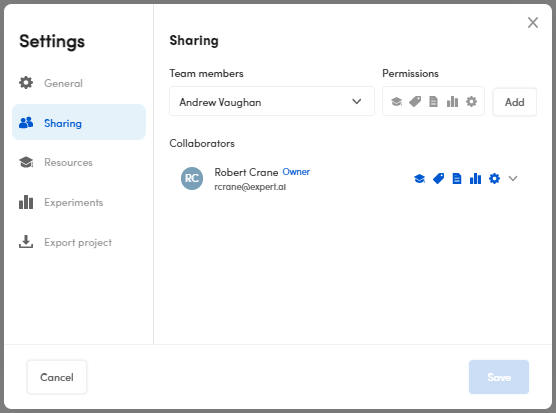
- Enter the email address or the name in Team members.
- Select the permissions to grant under Permissions:
- Edit resources

- Annotate documents

- Edit documents and libraries
- Manage experiments and models

- Settings

- Edit resources
- Select Add.
- Select Save to confirm.
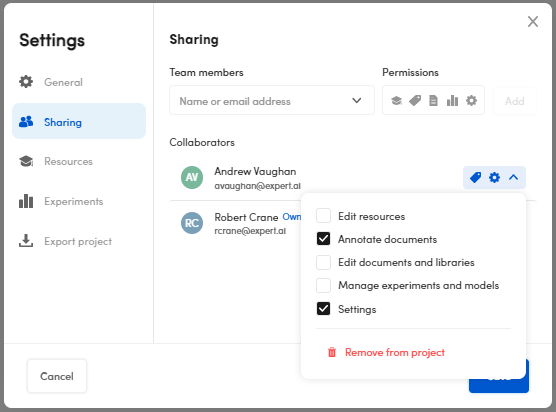
Grant and revoke permissions or remove a collaborator
- Select the permissions drop-down menu of a member from the Collaborators list.
- To grant or revoke the permissions, respectively select or deselect one or more of the following:
- Edit resources
- Annotate documents
- Edit document and libraries
- Manage experiments and models
- Settings
- To remove the team member, select Remove from project.
- To grant or revoke the permissions, respectively select or deselect one or more of the following:
- Select Save to confirm.
Resources
To change the display method of the project taxonomy, in the Resources tab:
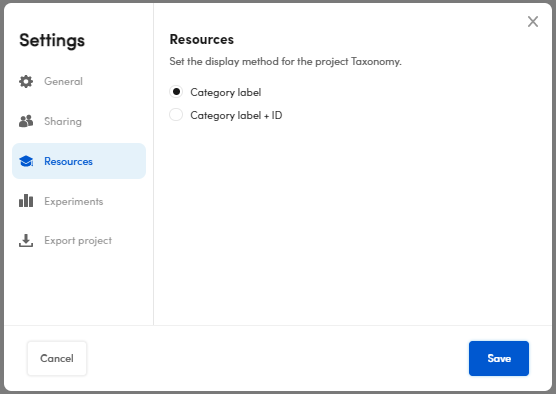
- Select Category label to view the taxonomy labels in the Resources tab, Taxonomy panel.
Or:
- Select Category label + ID to view the taxonomy labels and a unique ID for each one of them in the Resources tab, Taxonomy panel.
When done, select Save.
Experiments metrics policy
To select the preferred metrics policy visualization, in the Experiments tab, select one of the following:
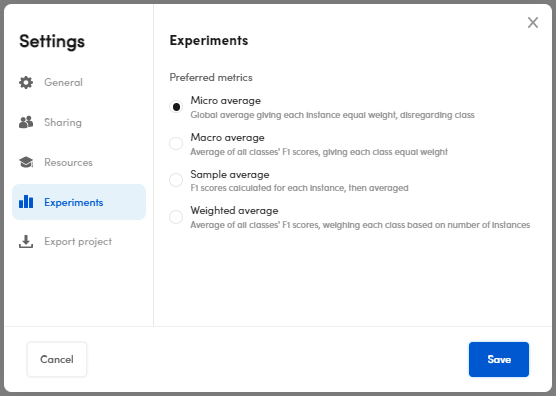
- Micro average
- Macro average
- Sample average
- Weighted average
Select Save to confirm.
Note
The metric policy affects the difference in values in the result metrics.
Export project
To export a project:
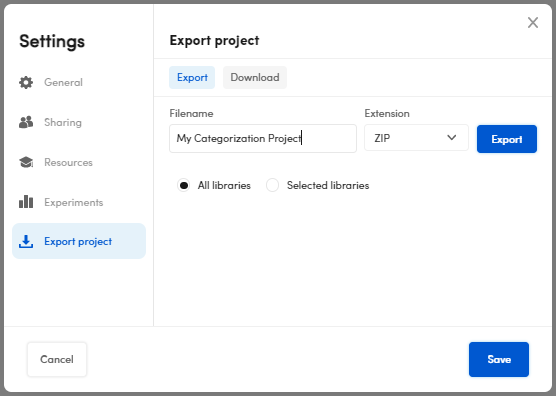
- Enter the name in Filename, or confirm the suggested one, in the Export project panel, Export tab.
- Select the format (
.ZIPavailable at the moment) in the Extension drop-down menu. - Select All libraries to export all your libraries or Selected libraries to export the library of your interest.
- Select Export.
- Select Download either in the Download tab or in the notification in the lower right corner.
Note
In case you need to export a project, you can also:
- Go to the main dashboard and select a project.
- Select Export
 in the Project info panel. The procedure is the same above.