Manage classes
The Resources tab
The Resources tab allows you to manage the classes of information to extract.
It is composed of the following panels:
- Resources displays a concise view of the defined classes, possibly divided into groups.
- Edit Classes is the editing area showing the classes details.
The Resources panel
Use this panel to manage classes and groups of classes.
Create new classes
To create new classes:
- Select Create class
 on the toolbar.
 - In Groups, select the group to which the new class belongs. Ungrouped classes is the default group.
-
In the Classes field:
- Type the name of a new class and press
Enter. - If you want to create additional classes, repeat the step above as many times as needed.
- Type the name of a new class and press
-
Select Create to confirm.
Create a group
To create a group, select Create group  on the toolbar.
Rename a group
To rename a group (except for Ungrouped classes):
- Select a group, then select the pencil icon
 in the right part of the box.
Or:
- Hover over a group name, then select the pencil icon
 .
.
Delete a group
To delete a group, select it, then select Delete group  on the toolbar.
Multiple selections using CTRL+CLICK or SHIFT+CLICK are allowed.
Remove all the classes from a group
To remove all classes from a group:
- Select the group.
- Select Ungroup classes
 on the toolbar.
 -
Select Confirm.
Note
When you ungroup all classes from a group, the latter will not be deleted, but will remain empty for new classes to group.
Create metadata class
To create metadata class:
- Select Create metadata
 on the toolbar.
 - In the Create metadata class, select the group, type the name of a class, then press
Enter. - You can create more classes repeating the step above. When done, select Create.
Export a class set in JSON format
To Export a class set in JSON format:
- Select Export class set
 on the toolbar.
 - In the Export resources window, type the name in Filename or confirm the suggested one, then select Export.
- In the Available for download area or in the notification in the lower right corner, select Download.
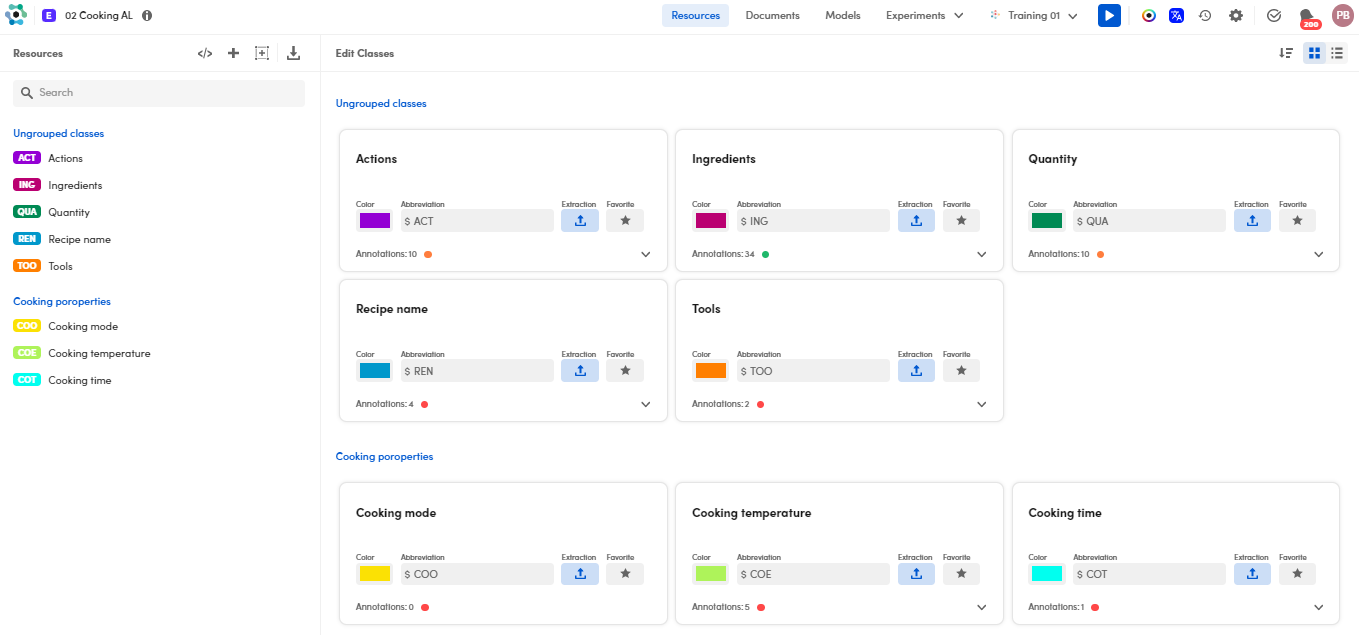
The Edit Classes panel
Alternative visualizations
In Edit Classes you can visualize classes as cards or as rows of a table.
To switch between visualizations, select Show table view  and Show card view
  on the toolbar.
Sorting
In card view, to change the sort order of the classes, select Sort  on the toolbar and then choose the desired option from the drop-down menu.
In table view, to sort the entries based on a specific item, select a column header.
Note
The items sorting is performed within the classes.
Edit class attributes
-
To change the class name, hover over the class box, select the pencil icon
 then edit the name.
 -
To change the class color, click the colored rectangle and choose the new color.
Info
The color code is useful to quickly distinguish between classes.
-
To change the short form of the class name, click on the field starting with a dollar sign and edit the value.
Info
Name abbreviations are useful in compact views and long lists.
Warning
Short forms that are considered as keywords (for example the entities and tokens short form as CAT, ANN, NPH, GEO, EXT, and so on) are not allowed.
-
To turn on and off the favorite flag, select the Favorite
 /
/ toggle switch.
Info
The favorite flag helps, when you have many classes, to choose from the list: favorite classes will appear first in the list when annotating a portion of a text.
-
To exclude or include the class extraction, select the Extraction
 /
/ toggle switch.
Info
Some classes or documents may have more or less relevance in the training, so to set a better strategy you can exclude or include their extraction in the experiments.
Delete a class
To delete a class, select it and choose Delete class on the toolbar.
Info
It is not allowed to delete a class when it is the only one defined in the project.
Put classes in a group
To put one or more classes in a group:
- Select the classes to be included in the group. Multiple selections with
Ctrl-ClickandShift-Clickare allowed. - Select Group classes
 on the toolbar.
 - In the dialog box, type the group name. As you type, the names of existing groups are suggested as possible choices. If no group corresponds to what you typed, you will be offered to create one.
- Select Group classes.
Info
When you select or deselect classes in one panel, they are selected or deselected in the other as well, so you can use the two panels interchangeably for these operations.
Remove classes from their groups
To remove classes from their groups:
- Select the classes to be removed from the group. Multiple selections with
Ctrl-ClickandShift-Clickare allowed. - Select Ungroup classes on the toolbar.
- Select Confirm.
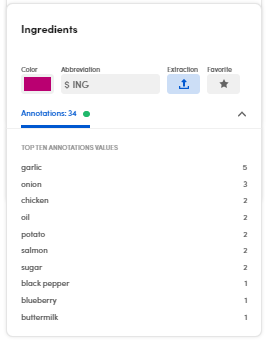
Check the annotations for a class
To check the annotations for a class, watch:
- Annotations item, if in card view.
Or:
- The Annotations column, if in table view.
To see the top ten annotations values for a class, when in card view, select the down arrow  .
.
To hide the top ten annotations values for a class, when in card view, select the up arrow  .
.