The detail view and its variants
Overview
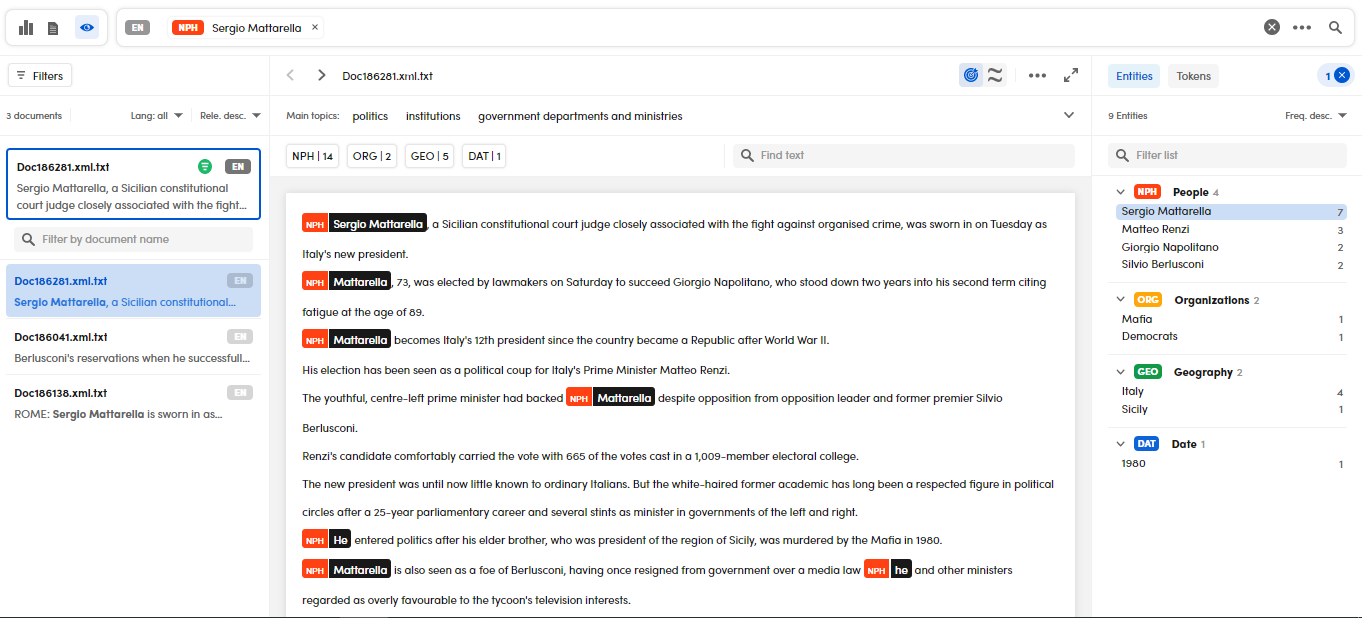
The detail view in the Documents tab of the project dashboard is an alternative to the list view and is focused on documents' text.
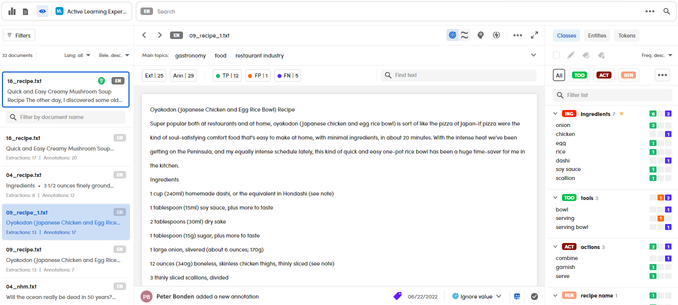
The upper part of the view is in common with the other views of the Documents tab: on the left the toolbar to switch to the other views (list and analytics) and the name of any selected experiment, then the search bar.
The current set of documents is shown in the left panel, with the selected document at the top.
The central area displays the text of the current document.
Info
The selected document is the one that was current in the source view, for example the list view. The current document is the one selected in the list and initially coincides with the selected document, then it can be changed by selecting other documents from the list.
The right panel lists information about the current document: those obtained from the NLU analysis carried out during document upload, any annotations and—if an experiment has been selected—any output of the experiment model such as categories or extractions.
The list of documents
The list of documents on the left is affected by any search criteria and filters.

Below the button to manage the presence-absence filter, you will find the number of selected documents and two drop-downs:
- With the first you can filter documents by language.
-
With the second you can sort the list in ascending or descending order with respect to:
- File name
- Relevance to the search criteria
- Number of annotations
- Number of experiment results (categories or extractions)
The document above the list is the selected document. As mentioned before, this is the document that was current in the source view of the Documents tab, which, by default, is the list view.
The list of documents which may or may not include the selected document based on current search criteria and filters, this is why the selected document has a marker that indicates whether is present (green marker  ) or absent (red marker
  ) in the list.
The language is indicated for each document.
For the documents in the list, information relating to annotation and to the experiment—such as the categories or the number of extractions—is reported below the text abstract. In the case of categories, the first two are shown: if there are more, the number of excess categories preceded by the plus sign is displayed on the right.
Between the selected document and the list there is a box that allows you to filter the list by document name. Type at least three characters, the match is case sensitive. Select the X icon on the right to cancel the filter.
To change the current document, select another document from the list.
When you change the current document, the selected document is unaffected. To change the selected document, double-click a document in the list.
Info
If you change the selected document, it will also become the new current document in the source view.
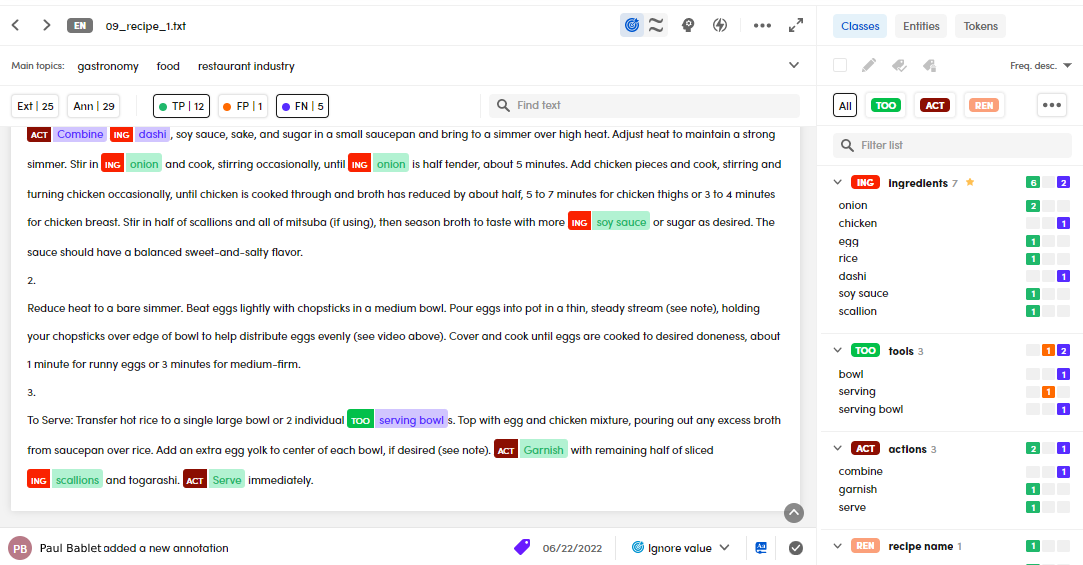
The central panel
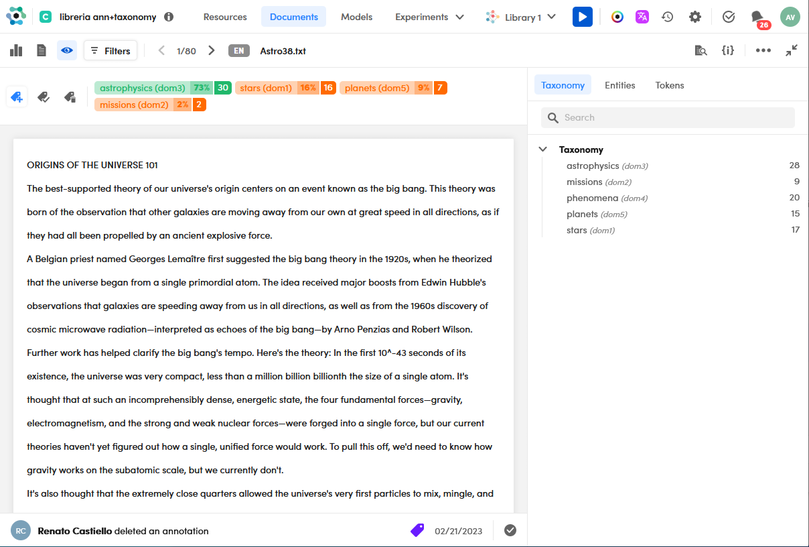
The central panel shows the text of the current document together with summary information and controls for performing all operations on the document.
Below you will find the description of panel elements that are common to all project types and don't have to do with annotation activities, which are described elsewhere in this manual.
First bar
In the topmost bar there are:
-
On the left:
- The buttons—Next document
 , Previous document
  —for passing from one document to another in the list, with the indication of the number of the current document and the total number of documents.
 - The language of the document.
- The name of the original file.
- The buttons—Next document
-
On the right:
- The buttons to alternatively show, in the right panel, information about the document (Value button
 ) or the list of related documents (Related documents button
  ).
). - Other buttons that are unique to the project type.
- The Pdf document view button
 to switch to Pdf document view, when available.
 -
An ellipsis button
 that opens a menu. The menu commands that are common to all types of projects are:
- Copy to clipboard to copy the text of the document to the clipboard.
- Show original text spacing to toggle the display of white space—blanks, empty lines—which is present if the original file but is not shown by default.
- Show justified text spacing to go back to the converted document spacing if Show original text spacing was selected.
- Show condensed document: to toggle condensed document view.
- Delete document to delete the document.
-
The Open Immersive view
 button to switch to the immersive view.
- The buttons to alternatively show, in the right panel, information about the document (Value button
Second bar
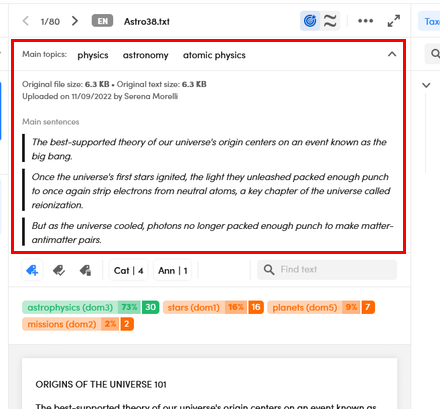
The second horizontal bar from the top shows summary information about the document.
The main Knowledge Graph topics the document is about are always displayed.
To toggle the display of main sentences, file size, text size, upload time and upload author select Show more ![]() or Hide details
or Hide details ![]() to the right of the main topics.
to the right of the main topics.
Third bar
The third horizontal bar from the top contains controls related to annotation and the results of the experiment plus a box that allows you to search the text of the document.

Buttons are only informative for categorization projects while for extraction and thesaurus project they also toggle the highlight of corresponding text when selected or deselected.
The first buttons from the left report the number of results (categories or extractions) and the number of annotations. The remaining buttons report about the number of true positives, false positives and false negatives.
Note
When not in the context of an experiment, the number of false negatives coincide with the number of annotations while the number of true positives and false positives is zero.
To find and highlight all occurrences of a string in the text of the document:
- Enter at least three characters in the Find text box and then press
Enter. The match is case insensitive. Select the X icon to cancel the operation.
Or, if the immersive view is activated:
- Select Find text
 in the upper right corner and proceed as in the previous step.
Fourth bar
The fourth bar from the top is unique to categorizations projects and is displayed only in the context of an experiment. It shows the output categories for the document.
Text area
The text area is where you can read the document, see highlighted information and perform annotation activities for extraction and thesaurus projects.
Its variants, the condensed document view, the immersive view and the Pdf document view, are described below.
Bottom bar
The bottom bar below the text area contains annotation information and controls plus the validation toggle switch.
The right panel
Entities and tokens
All documents go through a Natural Language Understanding (NLU) analysis during upload to recognize named entities and get semantic, lexical and keyword information about text tokens, so, whichever the project type, this information is available in the Entities and Tokens tabs of the right panel.
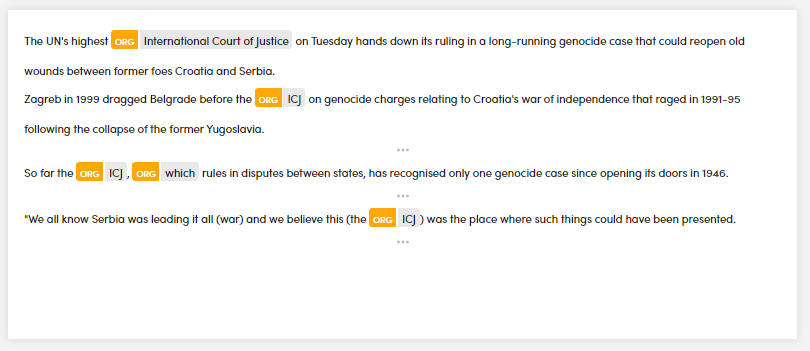
The Entities tab lists recognized named entities grouped by type.
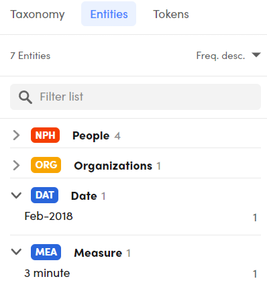
To filter the list of values, type a value or the initial part of it in the Filter list box and press Enter. The match is case sensitive. Select the X icon inside the box to cancel the filter.
To change the sort order, select the desired option from the drop-down menu at the top right of the list.
In the Tokens tab you will find all the other information obtained from the text tokens of the documents during the NLU analysis.
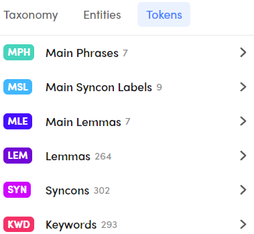
Each type of information corresponds to a list of values. When the list is expanded you can:
- Filter the list by typing a value or the initial part of it in the Filter list box and pressing
Enter. The match is case sensitive. Select the X icon inside the box to cancel the filter. - Change the sort order selecting the desired option from the drop-down menu at the top right of the list.
For both the Entities and the Tokens tabs:
-
To add an item to the search criteria for the current set of documents and trigger a search, double-click the item. Text corresponding to the item if highlighted, the right part of the highlight box has a black background.
-
To toggle the highlight of the occurrences of list items in the text, select and deselect the items.
Multiple selection is possible, even across tabs, and without pressingCtrl, however you cannot select both an entity type and one or more of its values.
The number of selected items is displayed in the upper right corner of the right panel .
.To remove all the highlights, select the X icon inside the counter.
Example
If you want to show the token value of the lemma snow in the document:
- Select the Tokens tab in the right panel.
- Select Lemmas, then the value snow to display all its occurrences in the text in focus.

For lemmas, main lemmas and syncons, if you want to look up the knowledge graph, hover over the item and choose Search lemma in knowledge graph or Search syncon in knowledge graph  . The list view of the knowledge graph navigator opens. In the case of a lemma, the lemma is used as a search criterion and all the syncons for all the concepts that can be expressed with that lemma are shown. In the case of a syncon, the concept is punctually shown.
For syncons, if you want more information, hover over the item and select Show information  . A pop-up appears showing the part of speech, the language, any gloss and the list of terms used to express the concept. To make the poop-up disappear, just click outside it.
Other information
The other tabs in the right panel show information that is peculiar of the project type:
- Taxonomy for categorization projects
- Classes for extraction projects
- Thesaurus for thesaurus projects
Related documents
The list of documents related to the current document appears in the right panel when selecting Related documents on the toolbar above the document text.
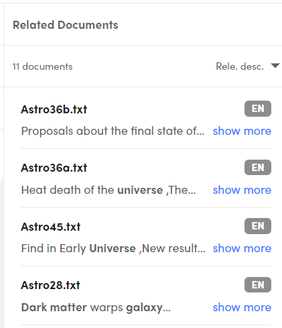
Select show more and show less or select repeatedly a document in the list to toggle the display of a greater portion of document text.
To make a document the new selected document, double-click it.
To change the sort order select the preferred option from the drop-down menu at the top right.
To show again the original tabs in the right pane, select Value .
Variants
Condensed document view
To focus on the selected items (like entities, tokens, extractions and so on) in their sentence and remove the remaining redundant text, select the ellipsis , then Show condensed document. A check appears beside this menu item.
To deselect entities and tokens:
-
Select the X button beside the counter of detected entities and tokens.
Or:
- Deselect each entity and token singularly.
If Show condensed document is checked and you want to display the whole document text:
- Select the ellipsis , then select Show condensed document again.
Or, if you have no entity or token in focus:
- Select Show full document in the central panel.
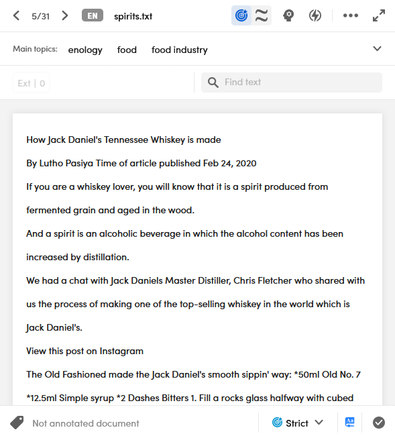
Immersive view
To switch to the immersive view, select Open Immersive view .
The immersive view lacks several elements of the interface—such as the document list on the left—to give more space to the document text.
The immersive view makes available, in JSON, the output of the document analysis performed automatically at the time of upload.
-
To display the analysis output select Data model view
 . The analysis output in JSON appears in the right panel.
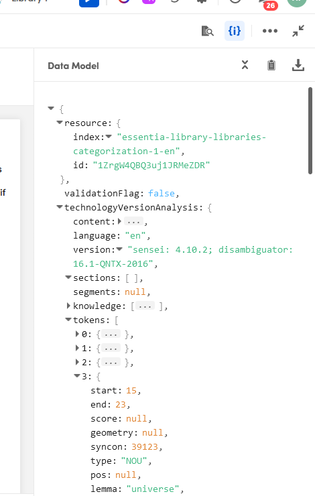
-
To download the analysis output select
 .
. - To expand and collapse the keys of the JSON use Expand all
 and Collapse all
  .
. - To copy the JSON To the clipboard select Copy result to clipboard
 .
. - To restore the visualization of informative tabs in the right panel, select Document view
 .
.
To switch back to the detail view, select Close immersive view  .
.
Pdf document view
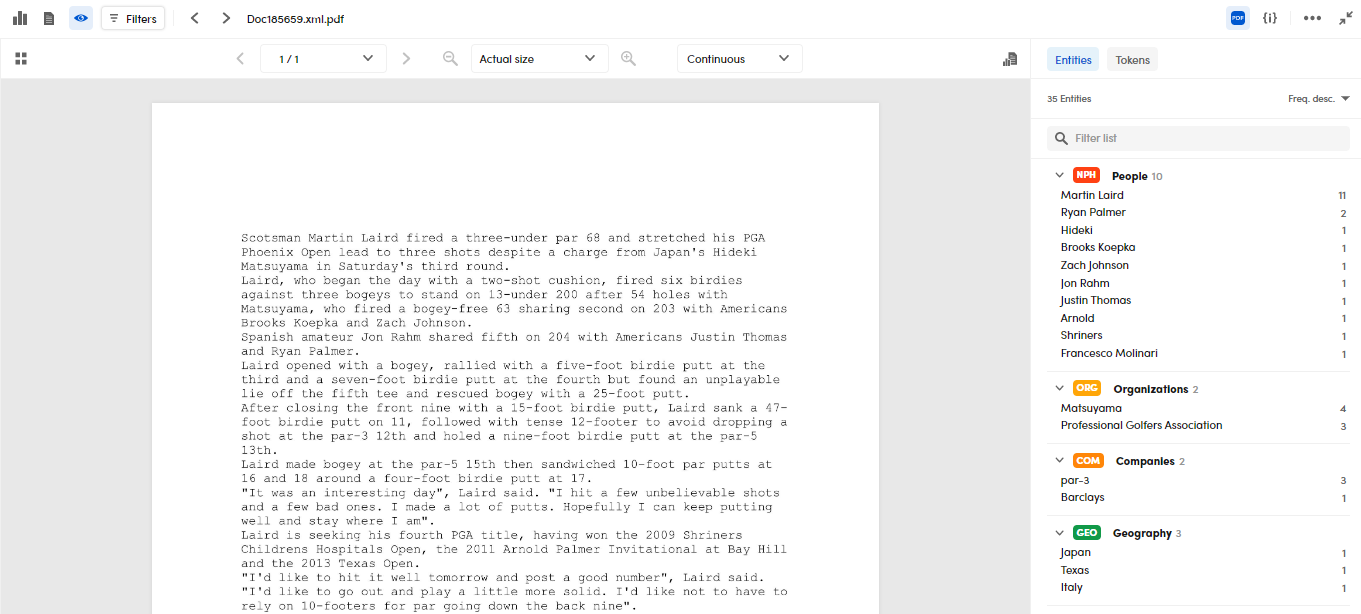
The Pdf document view is a kind of immersive view that shows a graphical rendering of the document. It's available only for PDF documents and if the Pdf document view option is enabled at upload time.
It is the default visualization when you open a PDF document in detail view.
-
To toggle this view, select Pdf document view
. -
To highlight portions of text corresponding to entities, tokens, classes—for extraction projects—or concepts—for thesaurus projects—, select them in the right panel.
The toolbar controls above the visualization are:

- The button with four squares
 is used to display a sidebar that shows the preview of all pages and allows you to switch from one page to another.
The sidebar has a toolbar with two buttons:
is used to display a sidebar that shows the preview of all pages and allows you to switch from one page to another.
The sidebar has a toolbar with two buttons: - Show thumbnails
 to show page thumbnails (default visualization)
 - Show search
 to display a search box that allows you to find pages containing a string. To start the search type the string and press
 Enter. The first page where the string occurs is displayed, with occurrences of the string highlighted in the text, and the sidebar disappears. To see the number of matches and a snippet of each match, select the four squares icon again. - Controls for browsing pages.
- The controls to manage the zoom.
-
The drop-down to choose the layout:
- Continuous for a single and continuous page visualization.
- Presentation for a single-page visualization.
- Magazine for a two-page visualization.
Note
In Presentation and Magazine layout you cannot scroll through the pages with the mouse.
Switch to the list view
To switch to the list view, select Browse documents  on the toolbar of the left panel.
Check the project analytics
Select Analytics  on the toolbar of the left panel to check the analytics details of:
- Categorization projects
- Extraction projects
- Thesaurus projects
- Corpora