Create a corpus
The procedures for creating a corpus depend on the number of items already present in the dashboard.
Procedures
To create a corpus:
- Go to the main dashboard.
If there are no other projects and corpora created
- Select the Corpus card.
Or:
- Select the plus button
and choose Corpus. This creation procedure is always available.
If there are other existing projects but no corpora
- Select Corpora
in the left menu, then Create your first corpus.
If there are other existing corpora
- Select New Corpus
in the Create item panel
Or:
- Select Corpora
in the left menu, then select New Corpus in the Create Corpus area.
Common preliminary steps
- In the dialog, enter the mandatory name, select the technology version from the Tech version drop-down list, enter an optional description then Next.
Warning
Once the technology version has been selected, it cannot be changed. It is necessary to re-create the project with a different one.
- Select Add files. You can upload single files from a folder or a set of zipped files.
- In the Settings tab:
- Switch on Pdf document view to process with the expert.ai Extract technology and view the PDF files in order to work on them in their original format. If not switched, all the documents are converted with the Apache Tika toolkit and used as txt files.
- Select or deselect Enable or disable table and title detection to enable or disable table and title detection.
- Select or deselect Enable or disable OCR extraction to enable or disable OCR extraction.
- Switch off Autodetect language to disable the automatic language detection. Select the preferred language manually from the Select language drop-down list.
- Switch off Autodetect encoding to disable the automatic character encoding detection. Select manually the preferred encoding from the Select encoding drop-down list.
- In the Documents tab:
- Display the list of documents and folders to upload. They can be deleted by clicking on the X button at the right of the file name.
- Select Create.
See Supported formats and limits.
Note
Watch the Background tasks  to check if the corpus is ready and properly created.
Access the created corpus
To access the corpus:
-
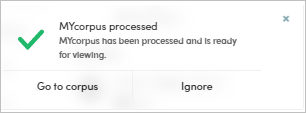
Select Go to corpus in the temporary notification.

Or:
- Select the corpus in the main dashboard.
If the number of uploaded documents doesn't immediately correspond to the right amount, refresh the page.