Publish and unpublish a workflow
Publish a workflow
To make a workflow usable by any client program through the Platform API, it must be published.
Publishing is the final step that allows the practical use of the workflow and the model—or models—it contains.
To publish a workflow:
- Select Publish
 on the toolbar in the main common toolbar.
 -
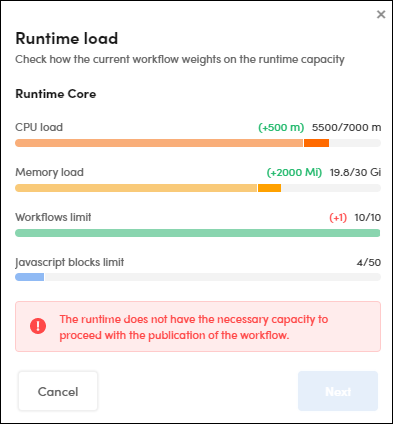
Check how the current workflow weights on the overall runtime capacity in the Runtime load dialog.
-
Set the parameters in the model edit window in case the resources aren't enough to run the model.
-
Select an optional API key in API key in the Publish workflow dialog, then select Publish.
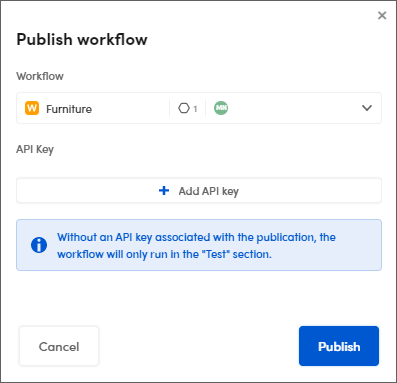
Info
If you don't select an API key, a workflow runs just in test.
An orange dot indicates that the workflow services are being activated.
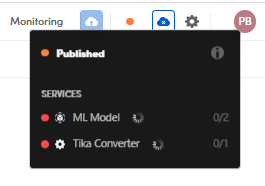
Select the info icon  to watch a detailed view.
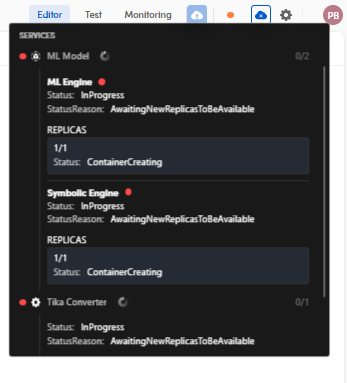
Also, for example, if you select more than one replica and only some of them are loaded and activated, they are highlighted with a yellow dot. This means that these partial services are activated, published and usable.
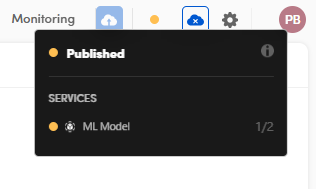
The ones marked in green are totally ready.
When all the services are ready, all the dots turn green and it means that the workflow is published.
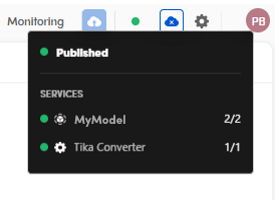
Published workflows are marked with a green dot also in the Published column of the Workflows view and in the lower right corner of the workflow card, when in card view.
If you modify the published workflow, a notification appears in the toolbar, suggesting to update.

The total number of workflows that can stay in the published state at the same time depends on the availability of Cloud resources. Published workflows that are no longer in use can be unpublished to free up resources for newer workflows.
Unpublish a workflow
To unpublish a workflow, select Unpublish  on the toolbar.
It is possible to unpublish a workflo also in the Workflows view.