Perform workflow tests
The Test tab
To test a workflow interactively, it is sufficient that it is published, it doesn't need a linked API key, which is instead necessary if you want to use the workflow programmatically via the NL Flow API.
You can test a published workflow using the commands available in the Test tab of the workflow's workspace.
The tab looks and is used a little differently depending on whether the workflow is synchronous or asynchronous.
Synchronous workflow
In case of synchronous workflow, the Test tab allows you to carry out one test at a time, each test replaces the previous one.
The default view is the one in which you set the input.

To take a test:
- Set the input.
- (Optional) Turn on Workflow debug to have an output richer in information about the inner functioning of the workflow.
- Select Test Workflow.
Wait for the analysis to be completed and consult the results.
Asynchronous workflow
In the case of asynchronous workflow it is possible to start new tests while previous tests are still in progress. The status of the various tests is shown and it is then possible to consult the results of all the tests taken during the session.
The default view is the one in which you set the input for the first test.
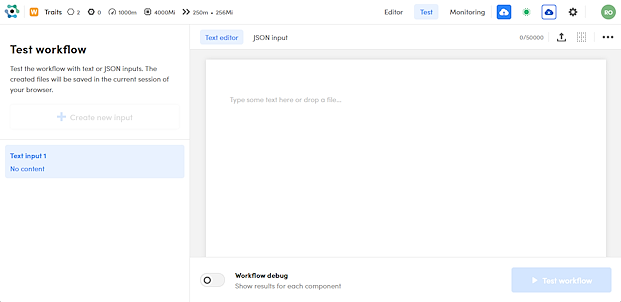
Run a test
To take a test:
- Set the input.
- (Optional) Turn on Workflow debug to have an output richer in information about the inner functioning of the workflow.
- Select Test Workflow.
Create a new test
If you have already made tests, whatever their status, you can create a new one. To create a new test select Create new input and proceed as above.
Get test info
The status of the current test is shown at the bottom of the input panel. Once a test is started, the input cannot be changed.
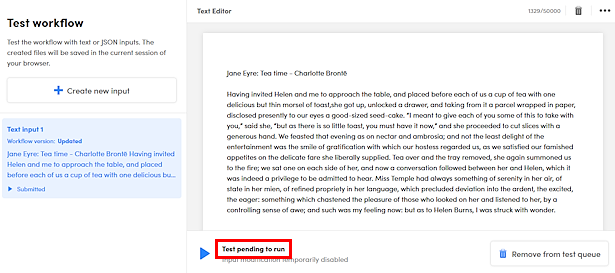
The status of each test is also shown in the corresponding box of the list on the left.
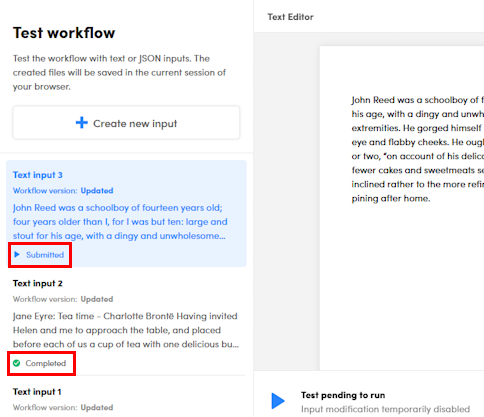
If a test was carried out with the latest published version of the workflow, in the corresponding box in the list on the left Workflow version value is Updated, otherwise it is the date and time of the previous publication. This allows you to compare the results of different versions of the workflow against the same input.
Consult the results of a test
To see the results of a completed test select View test results in the bottom right.

Change tests
To switch tests, select another test from the list on the left.
Remove a test from the queue
To remove a pending task from the queue:
- Select Remove from test queue
 on the toolbar above the input panel.
Or, if it is the current test and its execution is still pending:
- Select Remove from test queue at the bottom right.
Repeat a test
To repeat the current test, if completed, select Run new test at the bottom of the input panel.
Set input
The type of input you can enter depends of the first block in the workflow.
In the case of synchronous workflows, the possible choices are shown in the left panel, while in the case of asynchronous workflows they are shown above the input panel.
Enter or load plain text
If the workflow accepts plain text, you have the Text editor choice.
To enter or load plain text input, select Text editor, then you can:
- Enter a text in the Text Editor panel on the right (maximum 50000 characters).
- Select Upload
 on the editor toolbar to upload a text file (maximum 50000 characters).
 - Clear the editor by selecting Clear text
 on the editor toolbar.
Write or load the JSON
The JSON input choice gives you total freedom in specifying the input and is always available because every workflows accepts JSON. Based of the first block of the workflow, a template JSON can be available, so you don't have to write it from scratch.
To enter JSON, select JSON input, then you can:
-
Choose a JSON template compatible with the the left-facing block from the Select JSON input template
 drop down list on the Json Input panel toolbar.
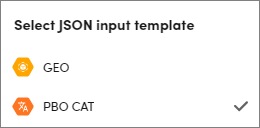
In the reference section you can find more information on the input format of models and processors.
-
Toggle top level keys in the JSON using the checkboxes inside the Filter JSON input keys
 drop down list on the editor toolbar.
This may be necessary in the case of models because some top level keys are mutually exclusive, like
documentLayoutandtext. -
Select Upload
 on the editor toolbar to upload a JSON file.
 - Complete or change the JSON manually at will.
- Clear the editor by selecting Clear text
 on the editor toolbar.
Upload a file
This possibility is available when the left facing block in a file-to-text converter, like the TikaTesseract Converter processor or the Extract Converter processor.
- Select Upload file.
- Select Browse files in the Upload file panel on the right to select and open the file.
Once a file is loaded, you can replace it by selecting Replace file.
Examine the results
After the test, in case of success, a colored dot followed by HTTP status code is displayed at the bottom of the left panel, for example:

Or:

If workflow debug is off, the right panel shows the output of the workflow inside a JSON viewer.
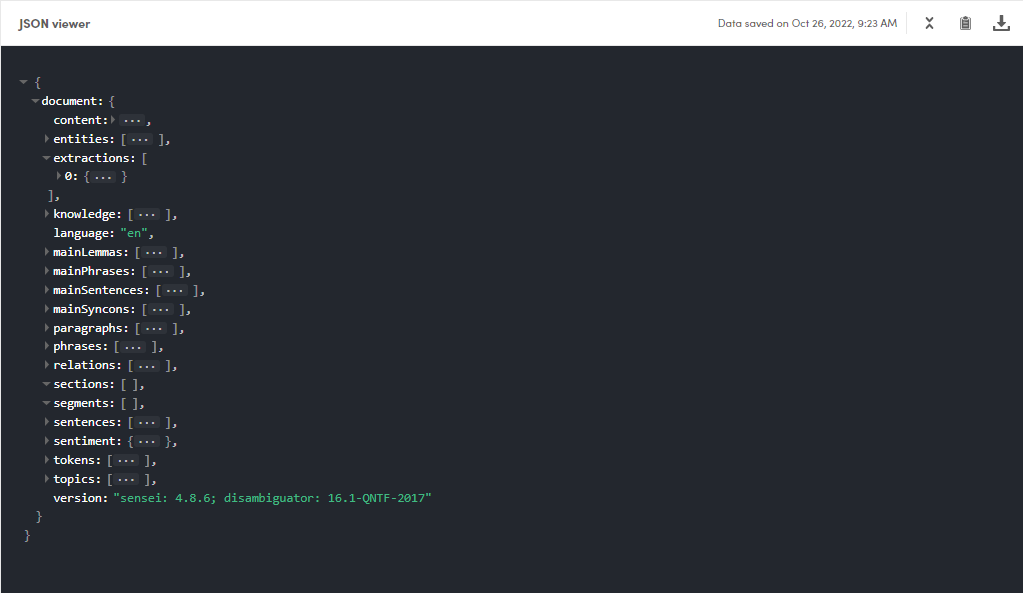
In case of error, if workflow debug is off, the right panel shows the error message in a sub-panel titled Error viewer.
If workflow debug is turned on, the panel on the right shows three tabs—Output, Input and Full JSON—plus start time and elapsed time.

Common commands
To collapse and expand the left panel, use the collapse button  and the expand button
  on the panel toolbar.
To refresh the results of synchronous workflows—for example after you published changes to the workflow—without having to go back to input and submit it again, select the refresh icon  on the left panel toolbar.
To return to input view, select Back on the left panel toolbar.
For panels showing JSON:
- To expand or collapse all the sections of the JSON at once, select Expand all
 or Collapse all
  on the panel toolbar.
 - To copy the JSON to the clipboard, select Copy result to clipboard
 on the panel toolbar.
 - To save the JSON to a file, select Download result
 on the panel toolbar.
 - To expand or collapse a JSON object, select the expand button
 or the collapse button
  to the left of the object inside the JSON.
Examine keys
When debug mode is off, the left panel lists the top level children of the document key of the output JSON.
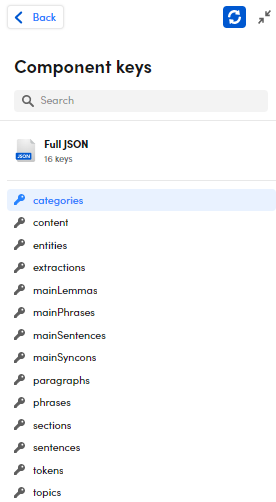
Selecting from this list, the right panel shows only the portion of the overall output JSON corresponding to the selected key, in some cases providing also an advanced view that makes it easier to browse data and provides information on the relationship output data and the input text.
To filter the list, enter a search criteria in the search box then press Enter. To clear the filter select the "X" button  inside the search box.
In case of a workflow with multiple flows, the keys are grouped according to the last block of each flow, for which the name and ID are displayed.
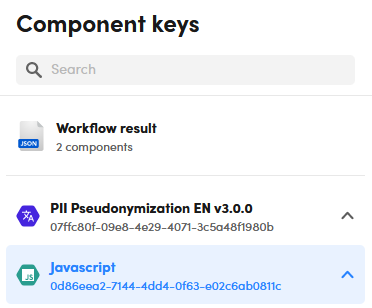
To display the entire output JSON instead of the selected key, select Full JSON for single flow workflow or Workflow result in case of multiple flows.
Debug mode
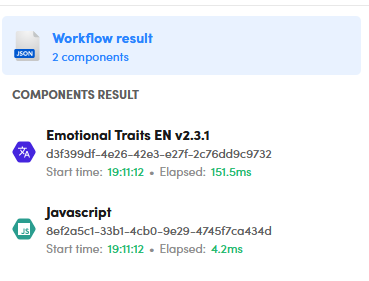
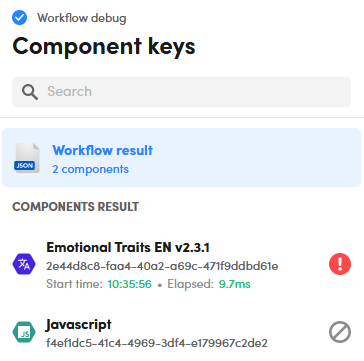
When workflow debug is on, the left panel lists the components corresponding to the workflow blocks under the COMPONENT RESULT label.
-
To get information about the whole workflow, select Workflow result on the left panel.
On the right panel you can:
- Find the overall workflow output in the Output tab.
- Find the workflow input in the Input tab.
- Find a verbose version of the workflow output in the Full JSON tab.
-
To see the output of a block, select the corresponding component from the list under COMPONENT RESULT on the left panel. The JSON is displayed in the Output tab on the right panel.
-
To see the input of a block, if any, select the corresponding component from the list under COMPONENT RESULT on the left panel. The JSON is displayed in the Input tab on the right panel.
All panels showing JSON have the same toolbar providing common commands.
In the event of an error with a multi-block workflow, the blocks that gave an error are marked with an exclamation mark and those not executed due to the error with the no-access signal.
Download the Postman collection
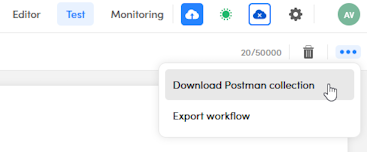
To download a Postman collection with which you can test a published workflow through the NL Flow API, select the ellipsis  to the right of the editor toolbar and choose Download Postman collection.
Once you have imported the collection into Postman, set collection variable API_KEY with the value of one of the API key linked with the published workflow. You can find more information about workflow-key association in the description of the Runtime view of the main dashboard of the NL Flow app.
Export the workflow
To export the workflow, save it and select the ellipsis  to the right of the editor toolbar then choose Export workflow.
The procedure creates and downloads to your computer a file with the .wfpk extension which contains the workflow definition and all non-standard components. For example, if the workflow contains blocks corresponding to symbolic or ML models, these will be included in the file, while processors, operators and knowledge models will only be referenced in the definition. This can make a big difference in file size.
The .wfpk files can be used to import the workflow into another NL Flow installation.