Create a workflow
The creation wizard
To create a new workflow, select the plus button  in the upper toolbar of the dashboard, then choose Workflow project.
In the New workflow dialog enter the name of the workflow and, optionally, a description, then select Create workflow. A wizard starts.
In the Workflow pattern step you can choose between:
- A pre-defined workflow pattern (Sequential or Parallel)
- A custom workflow

If you have selected a pre-defined pattern:
-
Select Next.
-
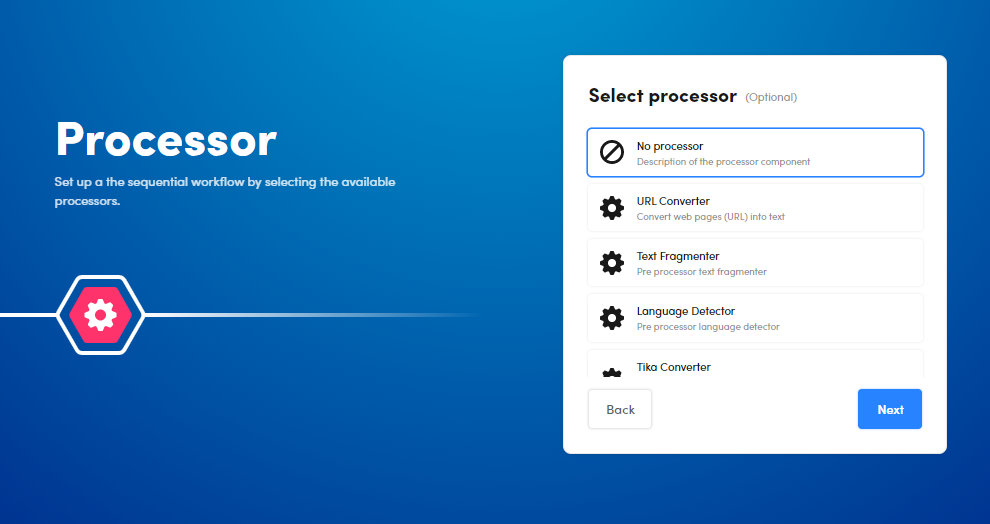
In the Select Processor step of the wizard you can select an optional pre-processor to start the workflow with.
-
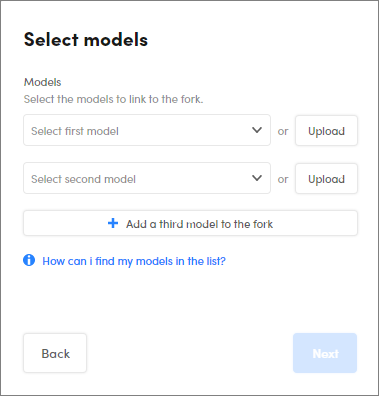
Select Next. You are now in the Models step of the wizard.
If you have selected the sequential pattern, select a model or upload one.

If you have selected the parallel pattern, select up to three models or upload them: to enable the third model, select Add a third model to the fork.
-
Select Next. You are now in the Operator step of the wizard.
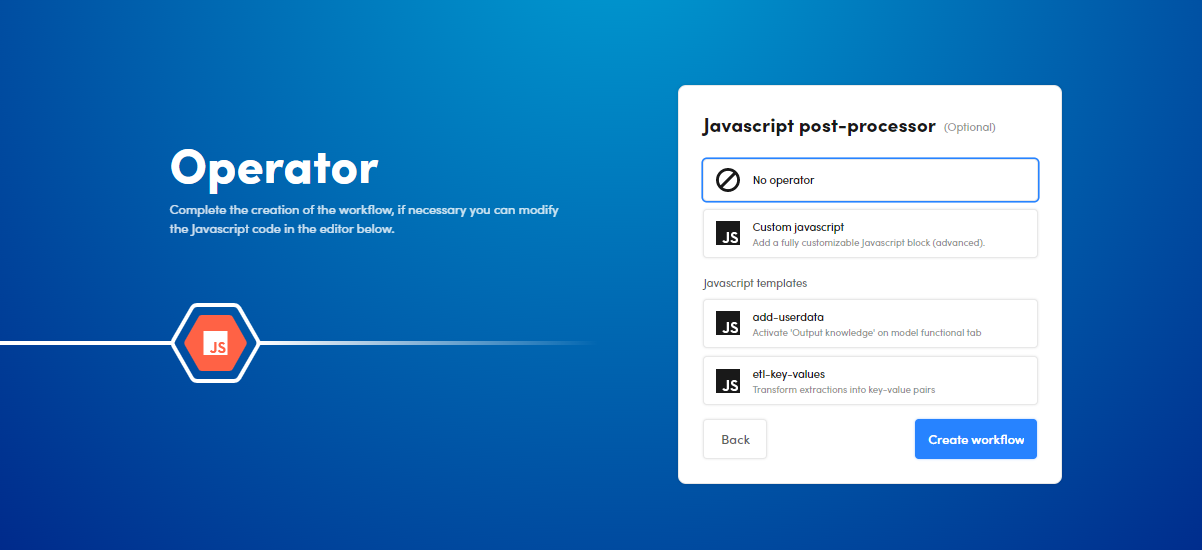
You can select an optional Javascript operator. It can be either an operator without any code (corresponding to the Custom javascript choice) or an operator pre-filled with a template code.
-
Select Next and the workflow editor opens, showing the pre-built workflow.
If you have selected Custom workflow, select Create workflow to open the workflow editor.
Import a workflow
To import a workflow that has been previously exported in the same or in another installation of NL Flow:
- Select the plus button in the upper toolbar of the dashboard, then Import Workflow.
- Select the file with
.wfpkextension to import (maximum size allowed is 4 GB). - Select Upload to confirm.
Upload a model
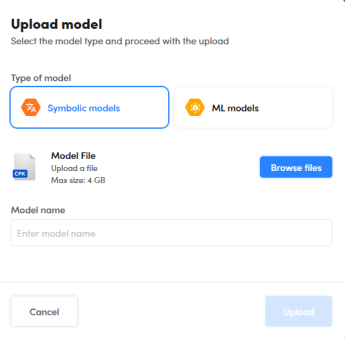
To upload a model on the fly while in the Models step of the creation wizard:
-
Select Upload. The Upload model dialog appears.
-
Select the model type.
- Select Browse files and locate the previously exported file.
- Enter the model name.
- Select Upload.
Info
The maximum allowed file size is 4GB.