Runtime view
The Runtime view of the NL Flow dashboard shows information about the machinery where workflow actually run and allows managing API keys.
API keys are authentication and authorization codes that need to be included in every call to the NL Flow API. They are not needed when testing workflows interactively inside the NL Flow Web application.
This view also allows publishing and opening workflows.
Runtime information
The NL Flow runtime can be thought of as a relatively large virtual computer made up of smaller computers. Each small computer has a certain capacity in terms of CPU and RAM memory and the sum of these capacities represents the overall maximum capacity of the runtime, established during the installation of NL Flow.
Overall, NL FLow runtime has also pre-defined limits for the number of published workflows and the number of JavaScript blocks in workflows published in synchronous mode.
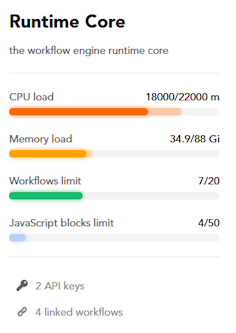
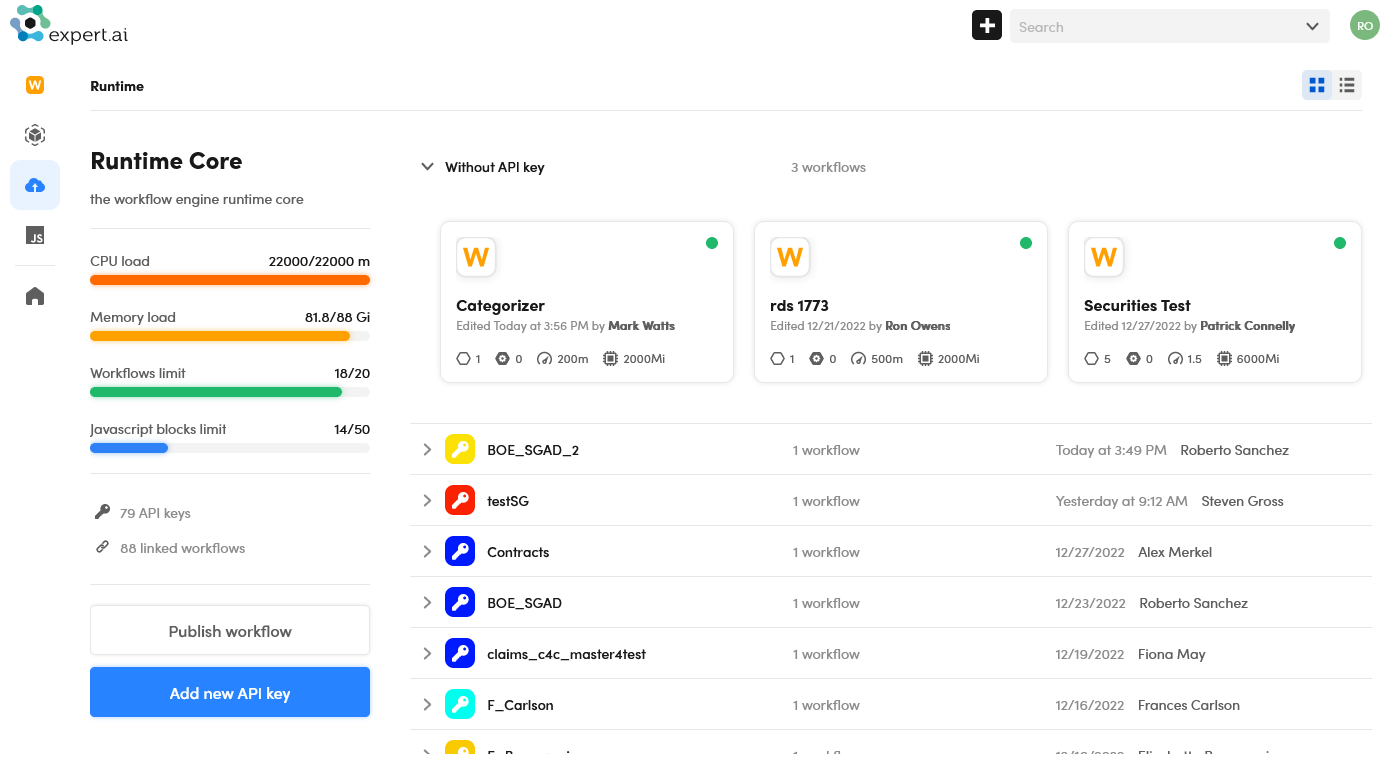
Under Runtime Core, in the left panel, you can find the current occupation and maximum capacity of the large computer for CPUs, memory, number of workflows and number of synchronous JavaScript blocks it can host. The number to the left of the slash, above each bar, is the current occupation, while the number after the slash is the maximum capacity.
NL Flow is based on a Kubernetes cluster. In a Cloud installation, the small computers (called nodes) are created and turned on when needed, then turned off and destroyed when not needed anymore, based on the quantity of resources (CPU, RAM) required by published workflows. This elasticity optimizes costs and is transparent to the users, which continue to see the runtime as a large computer with a fixed maximum capacity.
So, in a given time, it is possible that the large computer has less than the maximum capacity readily available, but this remains invisble to the users and can only be noticed when publishing a new workflow: if not enough resources are readily available to host the workflow, NL Flow can spin up one or more new small computers on the fly, and this may require some percepibile time.The comparison with the large computer does not hold up entirely, however, because its resources (CPU, memory) are not continuous, but rather fragmented on small computers.
This means that a block of a workflow does not have all the available virtual resources available, but at most that of a single small computer. The block—it's only instance or any of its replicas—must fit on a small computer, while the different blocks of the same workflow can run on different small computers.
This establishes a hard limit on the resources that can be allocated to a single block which can only be overcome by re-deploying NL Flow on "larger" small computers.
Runtime information is :
- CPU load: the number of CPUs that have been allocated and are in use or ready to be used for published workflows (the tomato-red bar), the number of allocated CPUs, which includes the previous, but can be larger in the case of asynchronous workflows with blocks—or replicas of blocks—that are not ready to use still (the tomato-red bar plus any lighter red bar to the right of it) and the CPUs capacity left (the gray bar).
CPUs are expressed in thousandths of one CPU, so for example, 7000 m corresponds to 7 full CPUs, while 4500 m corresponds to 4 CPUs "and an half". The m suffix stands for "milli".
The light red bar, when present, corresponds to CPUs that have been allocated for asynchronous workflows but are not ready to be used. They are actually turned on and off automatically, based on autoscaling parameters and the workload. - Memory load: the quantity of RAM that has been allocated and is in use or ready to be used for published workflows (the orange bar), the quantity of allocated RAM, which includes the previous, but can be larger in the case of asynchronous workflows with blocks—or replicas of blocks—that are not ready to use still (the orange bar plus any lighter orange bar to the right of it) and the RAM capacity left (the gray bar).
RAM is expressed in mibibytes or gibibytes.
Similarly to CPUs, the light orange bar, when present, corresponds to RAM that has been allocated for asynchronous workflows but is not ready to be used. It is actually turned on and off automatically, based on autoscaling parameters and the workload. - Workflows limit: the current and the maximum allowed number of published workflows.
- JavaScript blocks limit: the current and the maximum number of JavaScript Interpreter blocks used in all the workflows published in synchronous mode. Synchronous JavaScript Interpreter blocks don't actually occupy space, but since they are all executed by the same software component, their number must be limited to avoid overload.
The panel also shows the number of API keys and the number of workflows linked to those keys.
Workflows without API key
Above the list of API keys, the list of workflows not linked to an API key is shown. To show and hide the list use the toggle button to the left of the Without API key label.
Use the Show card view  and Show table view
  buttons on the area's toolbar to switch between table and cards visualizations for the list of workflows.
The information that is displayed inside the list is described in the article about the Workflows view. In table view this information is:
- Workflow name
- Number of blocks
- Initials of the user that made the last edit
- Last edit time
- Publish state (the colored dot)
Browse API keys
For each API key, the number of linked workflows, the creation date and the name of the creator are displayed.
- To show and hide the list of workflows linked to an API key use the toggle button to the left of key name. The information for each workflow is the same as in the list of workflows without a key (see above). Also the same visualzations—cards or table—apply.
Create an API key
To create a new API key select Add new API key at the bottom left of the page.
A wizard starts, asking for the name and an identifying color for the key. Specify this information and select Create.
The generated key is shown in a dialog.
Warning
The key is only visible at this time. It is therefore necessary to copy the key before closing the dialog.
Select Copy to clipboard then paste the value in a safe storage, for example using a password manager.
Regenerate a key
API keys do not expire, but it's a recommended security practice not to use them for too long.
Regenerating an API key invalidates its current value and generates a new value.
Warning
Any NL Flow API client application using the old key value will stop working and needs to be updated with the new value.
- To regenerate an API key, select it and choose Regenerate
 on the area's toolbar.
Link a key to workflows
To link an API key to one or more workflows:
-
Select any key from the list then select Link workflows
 on the area's toolbar. The Associate API key dialog appears.
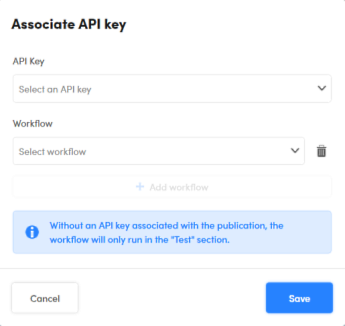
-
Select the key from the API Key drop-down list.
- Select the workflow from the Workflow drop-down list.
If you want to link the same key to more workflows:
- Select Add workflow: a new drop-down list appears.
- Select the workflow from the new drop-down list. Repeat from step 1 to link more workflows.
To remove a workflow from the list, select the trash can button  on the right of the workflow item.
Info
It's not needed that the workflow is published to link an API key to it.
You can also link an API key to a workflow when you publish the workflow.
Delete a key
To delete an API key, select it from the list and choose Delete on the area's toolbar.
Warning
Any NL Flow API client application still using the deleted key value will stop working.
Edit a key
To change the name or the identifying color of an API key, select it from the list then select Edit  on the area's toolbar.
Open a workflow
To open a workflow that is listed under an API key or Without API key:
-
In table visualization:
- Double click the workflow row
Or:
- Select the workflow name
-
In cards visualization:
- Double-click the card
Or:
- Select the workflow name
The workflow is opened in its workspace where the default tab is Editor.
Publish workflows
-
To publish a workflow and link it to one or more API keys:
-
Select Publish workflow at the bottom of the left panel. The Publish workflow dialog appears.
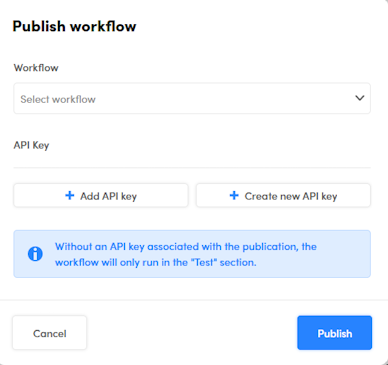
It is not mandatory to link API keys to the workflow, but a published workflow without a linked API key cannot be used with the NL Flow API, in can only be interactively tested in the Test tab.
-
To add a link to an API key:
- Select Add API key: a new drop-down list appears.
- Select the key from the new drop-down list. Repeat from the previous step to link more keys.
-
To remove the link with an API key, select Remove
 to the right of the key.
 -
To change a linked key, click its name. All API keys whose name contains that of the pre-selected key will be shown in a drop-down list, with the current key marked with a check mark.
- To view additional keys, edit the key name: all keys whose name contains what you type will be listed.
- To choose another key, select it from the list.
-
To create a new API key and link it to the workflow:
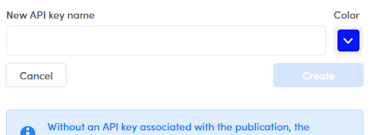
- Select Create new API key.
-
Enter the name of the key in New API key name, choose its color from the Color palette and select Create.
-
Copy the key value to the clipboard—possibly using the Copy key to clipboard
 button—then paste it and save it in a safe place.
-
-
When done with the API keys, select Next and complete the publishing wizard.
-
-
To publish one or more workflows linked to an API key:
-
Select any API key then select Publish
 on the area's toolbar. The Publish workflow dialog appears.
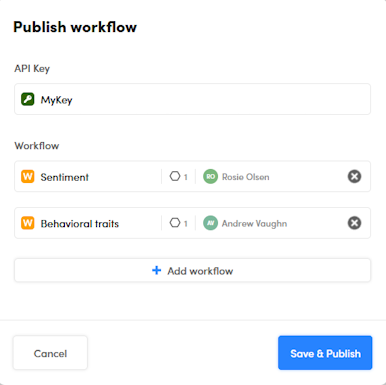
If the key is already linked to one or more workflows, they are listed under Workflow, otherwise a Select workflow drop-down list is displayed.
-
To add a link to a workflow:
- Select Add workflow: a new drop-down list appears.
- Select the workflow from the new drop-down list. Repeat from the previous step to link more workflow.
-
To remove the link to a workflow, select Remove
to the right of the key. -
To change a linked workflow, click its name. All workflows whose name contains that of the pre-selected workflow will be shown in a drop-down list, with the current key marked with a check mark.
- To view additional workflows, edit the workflow name: all workflows whose name contains what you type will be listed. If you remove all characters all workflows will be listed.
- To choose another workflow, select it from the list.
-
-
When done with the the selection of the workflows, select Next and complete the publishing wizard.
-
Switch to another view
To switch to another view of the dashboard, use the left menu described in the introduction to the dashboard.