Edit a workflow
The editor and the canvas
The workflow is designed in the Editor tab, which opens at the end of the creation wizard or when opening an existing workflow from the Workflows dashboard.
The central part of the editor is a canvas: the workflow corresponds to the diagram you draw inside the canvas.

The canvas contains an invisible hexagonal grid that reveals itself when you hover over it as you add or move blocks. All the blocks and connectors snap to this grid.
Components
The left panel, Components, shows the blocks you can choose from to draw the workflow.
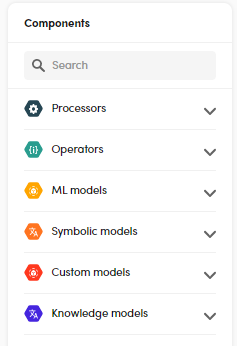
Components types are:
- Processors
- Operators
- Symbolic and ML models
- Knowledge models
- Custom components
Symbolic and ML models are those that have been previously published from Platform authoring application or uploaded from the Models view of the main dashboard.
Knowledge Models are built-in models. Custom components are installation or customer specific components.
Info
The models that were created in the authoring part using the Pdf document view annotations tool, must be preceded by an Extract converter processor.
The flow
Each workflow has a processing direction that goes from left to right, so place the blocks along the same direction. To create the flow you connect blocks: a connection means that, at runtime, the outptut of the left block will "flow" to the right block.
Typically a workflow consists of a single flow of blocks connected to each other, but it is possible, in the same workflow, to draw multiple unconnected flows. In this case, the first block of all the flows receives the same input and the overall output of the workflow is the concatenation of those of all the flows.
Add blocks
To add a block to the workflow:
-
Select the corresponding component from the left menu: a grid of dashed hexagons is displayed and shows the locations where you can place the block.
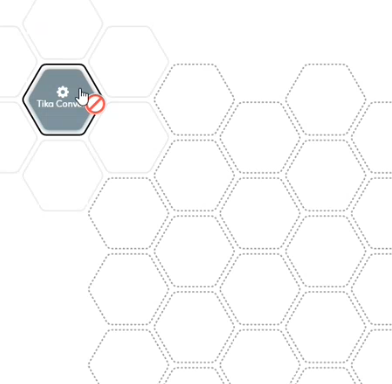
The "no passing" sign
 appears if you try to place the block in a position that is not allowed.
 -
Place the block over a dashed hexagon.
Remove blocks
To remove a block, select it in the canvas and:
- Right-click and select Delete selected component
 on the context menu.
Or:
- Select Delete selected component
 on the canvas toolbar.
Move blocks
To move a block, select it in the canvas and then:
- Right-click and select Move selected component
 on the context menu, then move the block to the new position and click to release it.
Or:
- Select Move selected component
 on the canvas toolbar, then move the block to the new position and click to release it.
You cannot place a block adjacent to another, the "no passing" sign  appears if you try to place the block in a position that is not allowed.
Connect blocks
Add and remove linear connectors
Use the linear connector to connect two blocks that are within one segment of each other.
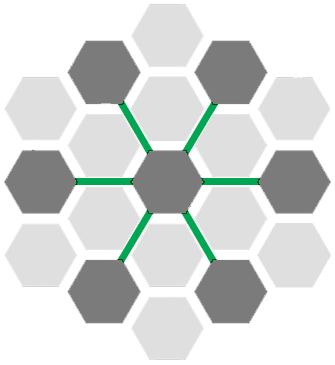
To add a linear connector between two blocks:
-
Select the white space corresponding to the ray shared by the two blocks.

Or:
- Right-click the first block and select Connect selected component
 on the context menu, then select the second block.
Or:
- Select the first block.
- Select Connect selected component
 on the canvas toolbar.
 - Select the second block.
Each linear connector has an arrow that reminds you of the flow direction (from left to right).
-
To remove a linear connector, select it, then:
- Press the
Delkey.
Or:
- Select Delete selected component
 on the canvas toolbar.
- Press the
Add and remove junctions
Linear connectors cannot be linked one to another, so, for longer paths, use junctions.
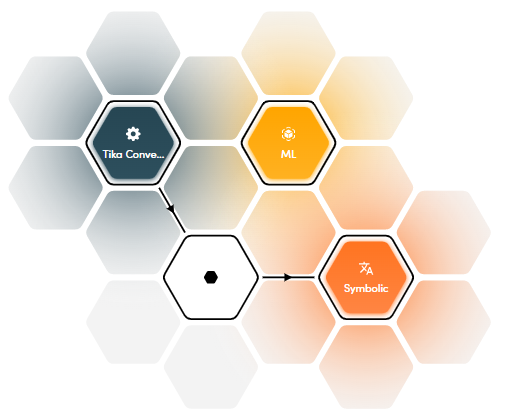
A junction is both a (inactive) component and a multiple connector. The junction component is represented by a white hexagon with a small black hexagon at the center.
-
To add a junction, just select the empty hexagon at the end of a linear connector.
-
To remove a junction, just select it. Selecting a hexagon at the end of a linear connector—when not already occupied by an active component—then acts as a toggle switch to add or remove a junction.
Edit a block
-
To edit the properties of an active component:
- Select the component, right-click and select Edit component
 on the context menu.
Or:
- Double-click the component.
Or:
- Select the component, then select Edit component
 on the canvas toolbar.
- Select the component, right-click and select Edit component
Info
In the reference secion of this manual you find the description of the properties you can set when editing a block.
Undo and redo changes
To undo or redo a change, select Undo  or Redo
  respectively on the canvas toolbar.
Save changes
To save changes, select Save on the canvas toolbar.
Validate the workflow
To validate the workflow, select Validate current workflow  on the canvas toolbar.
Info
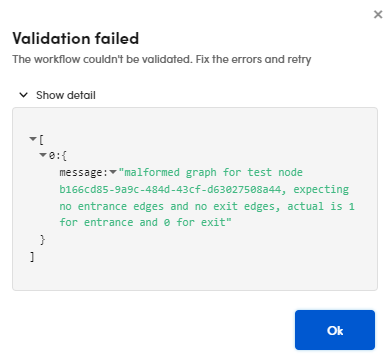
If the validation fails, the Validate current workflow icon shows a red alert sign  and the Validation failed dialog is displayed. Expand Show detail to know more aboute the errors.
Clear the canvas
To clear the canvas, select Clear workflow  on the drawing area toolbar.
Warning
If you clear the canvas, all your changes are lost, so save changes frequently.
Optimize layout
- To optimize the blocks position in the canvas, select Optimize layout
 on the canvas toolbar.
Zoom
To enlarge and reduce the diagram select Zoom in  and Zoom out
  .
.
Workflow info

The left part of the toolbar displays information about the workflow, in particular:
- Number of blocks
- Number of Javascript blocks
- CPU load
- Memory load
Each time you modify and save the workflow the information are updated.